 White
White
 Pink
Pink
 Red
Red
 Orange
 Ivory
Ivory
 Yellow
 Gold
Gold
 Brown
Brown
 Green
Green
 Blue
Blue
 Purple
 Grey
Grey
 Black
Black
 Multi
Multi
 Abstract
 African Print
 Animal Print
 Baby & Nursery
 Buffalo Check
 Camo Print
 Celestial
 Church
 Damask
 Embroidered
 Floral
 Geometric
 Gingham Check
 Houndstooth
 Licensed
 Paisley
 Plaid
Plaid
 Polka Dot
 Sports
 Stripe
 Tie Dye

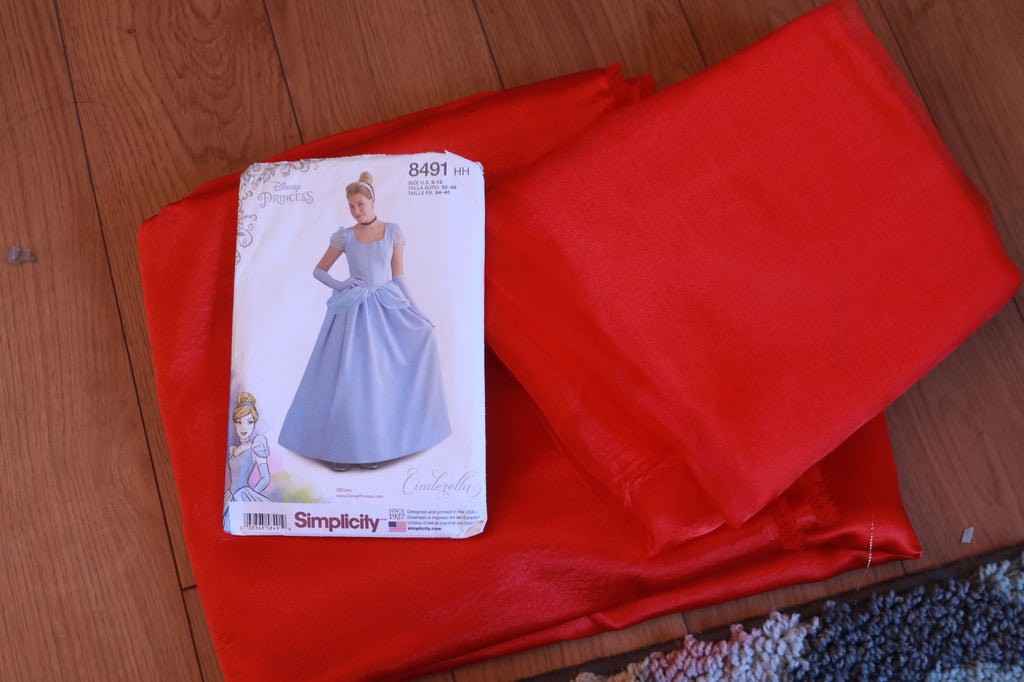
A DIY New Years Cinderella Ball Gown Sewing Tutorial
Looking to ring in the new year, but don’t have that perfect outfit to start the year right? Well look no further! This Simplicity dress will catch the eyes of your friends and family.
Supplies:
- Pattern: Simplicity 8491
- 4 Yards of Black Crepe Back Satin
- 4 Yards of Red Crepe Back Satin
- 6 Yards of Crystal Organza
- 1” button or Hook and Eye
- (OPTIONAL) 8 yards of ribbon
Time:
3-4 Hours
Difficulty:
Easy/Medium
LET'S GET STARED!
- To start off, I used Simplicity 8491 for this project!
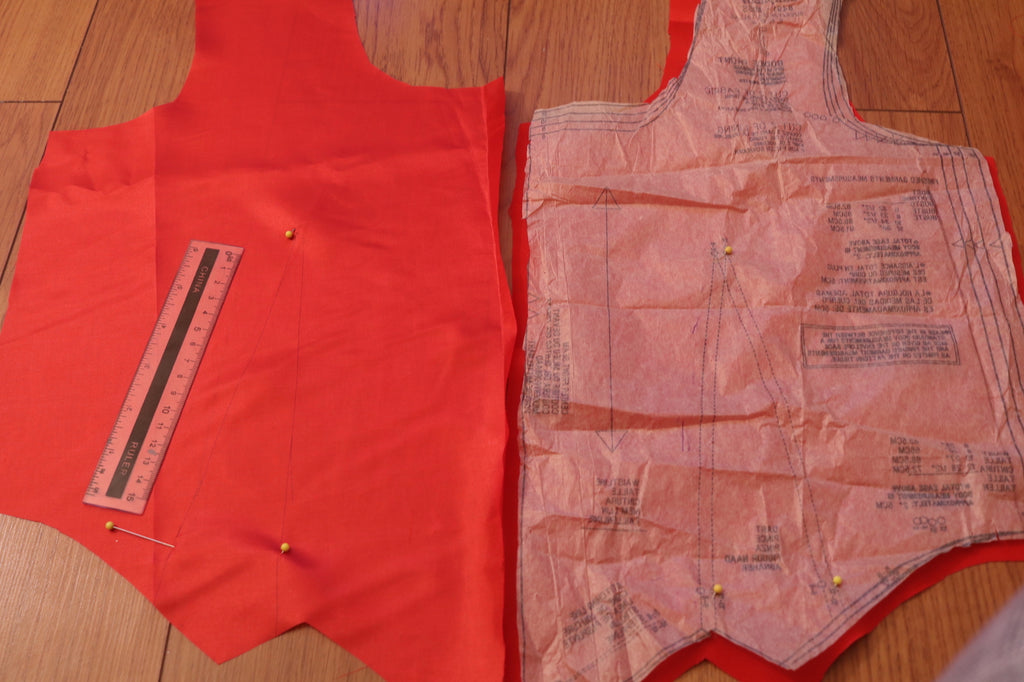
- After you’re finished cutting out the pattern. You’re going to lay pattern numbers 1,2,7, and 8 on the the red crepe back. Make sure that you’re pinning 7 and 8 on the fold of the fabric.


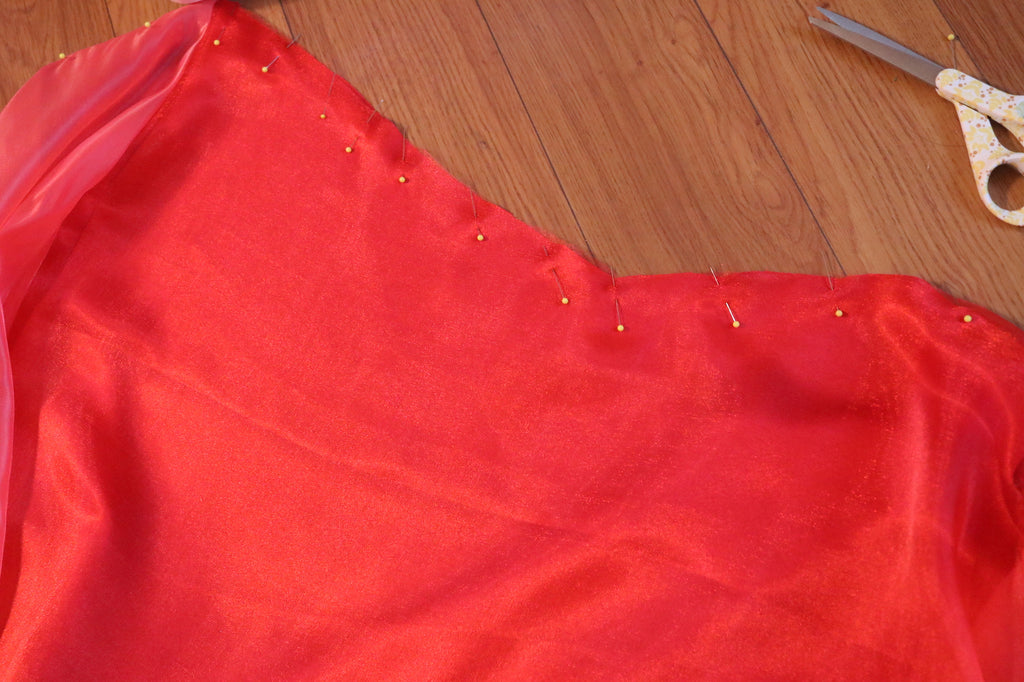
- After cutting, pin and sew skirt back and side front(8) together with the skirt front (7). You’re going to leave about 3 inches opening at the top of where the skirt backs/skirt side front will meet. This Is where the zipper will be going in the future. Don’t forget to hem the bottom of the skirt.

- Now it’s time to dart your bodice front and back. Follow the pattern lines shown above. Once you marked and pinned the darts, you’re going to sew them together.


- Like direction A4, you’re going to repeat for both the front and the back of the fabric. Repeat again for the lining part of this garment.

-
After you’re finished darting the garment, you’re going to pin the front of the bodice together, along with attaching the straps to the bodice back. Make sure you keep the bodice back open like shown above, this is where the zipper is going to be placed. In the second photo above, I am pinning the lining with the main bodice. Be sure that the “wrong side” of the fabric is facing outwards towards you. Also make sure you leave at least one corner of the garment open, so you can turn it inside out.
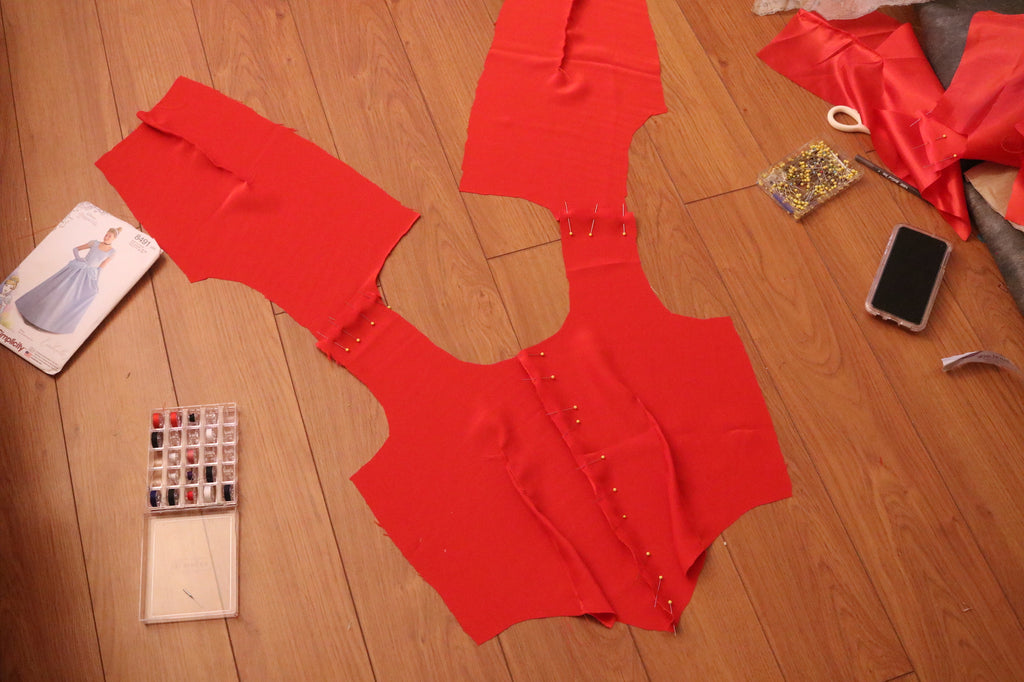
- After you’re finished sewing the lining to the bodice, and turning it inside out, your garment should look like the photo above.

- (OPTIONAL) To add a little extra to my garment, I sewed on lacey ribbons around the collar and sleeve.


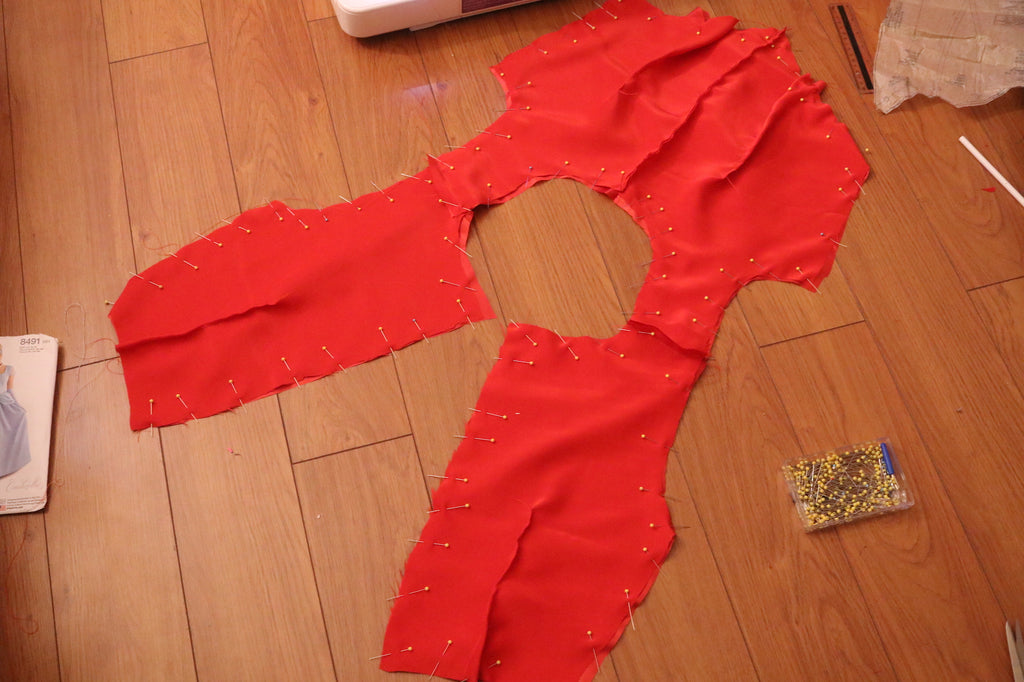
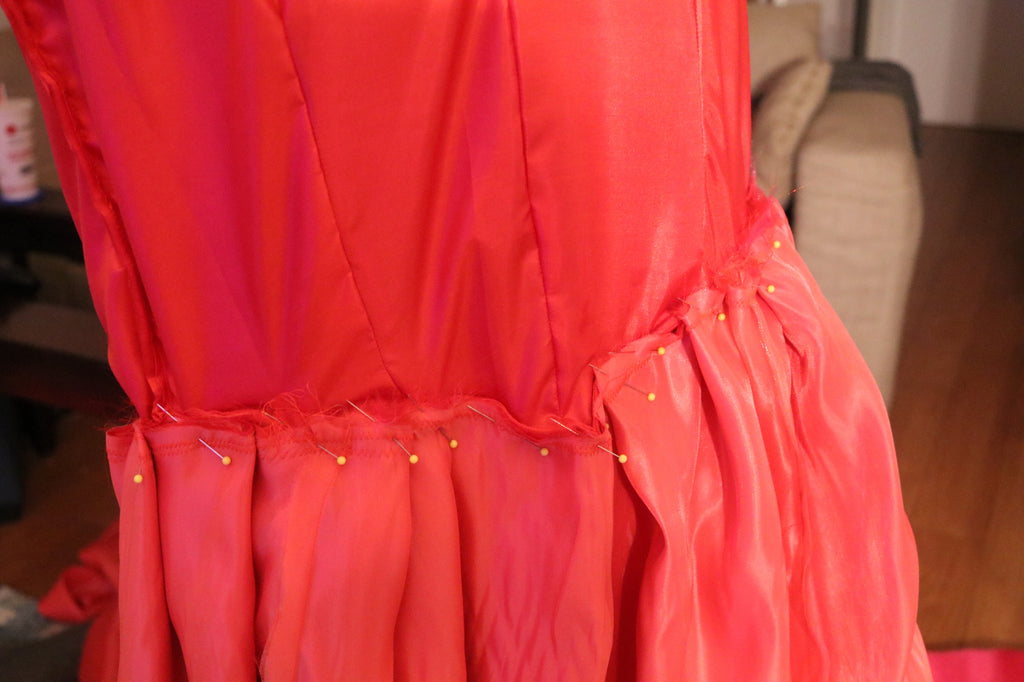
- For this step, you’re going to repeat A2, minus adding the bodice front and bodice back. You’re going to pin and cut pattern 7 and 8 to the organza fabric. Repeat this step once more. After you’re finished you should have two sets skirt front and skirt back and side front. Repeat A3, where you will be pinning and sewing the pieces together. Afterwards, we’re going to pin both the organza fabric onto the satin skirt, like shown above in the second photo.

- For the final step of the ball gown, we’re going to turn the bodice and skirt garment inside out and pin them together like shown above.

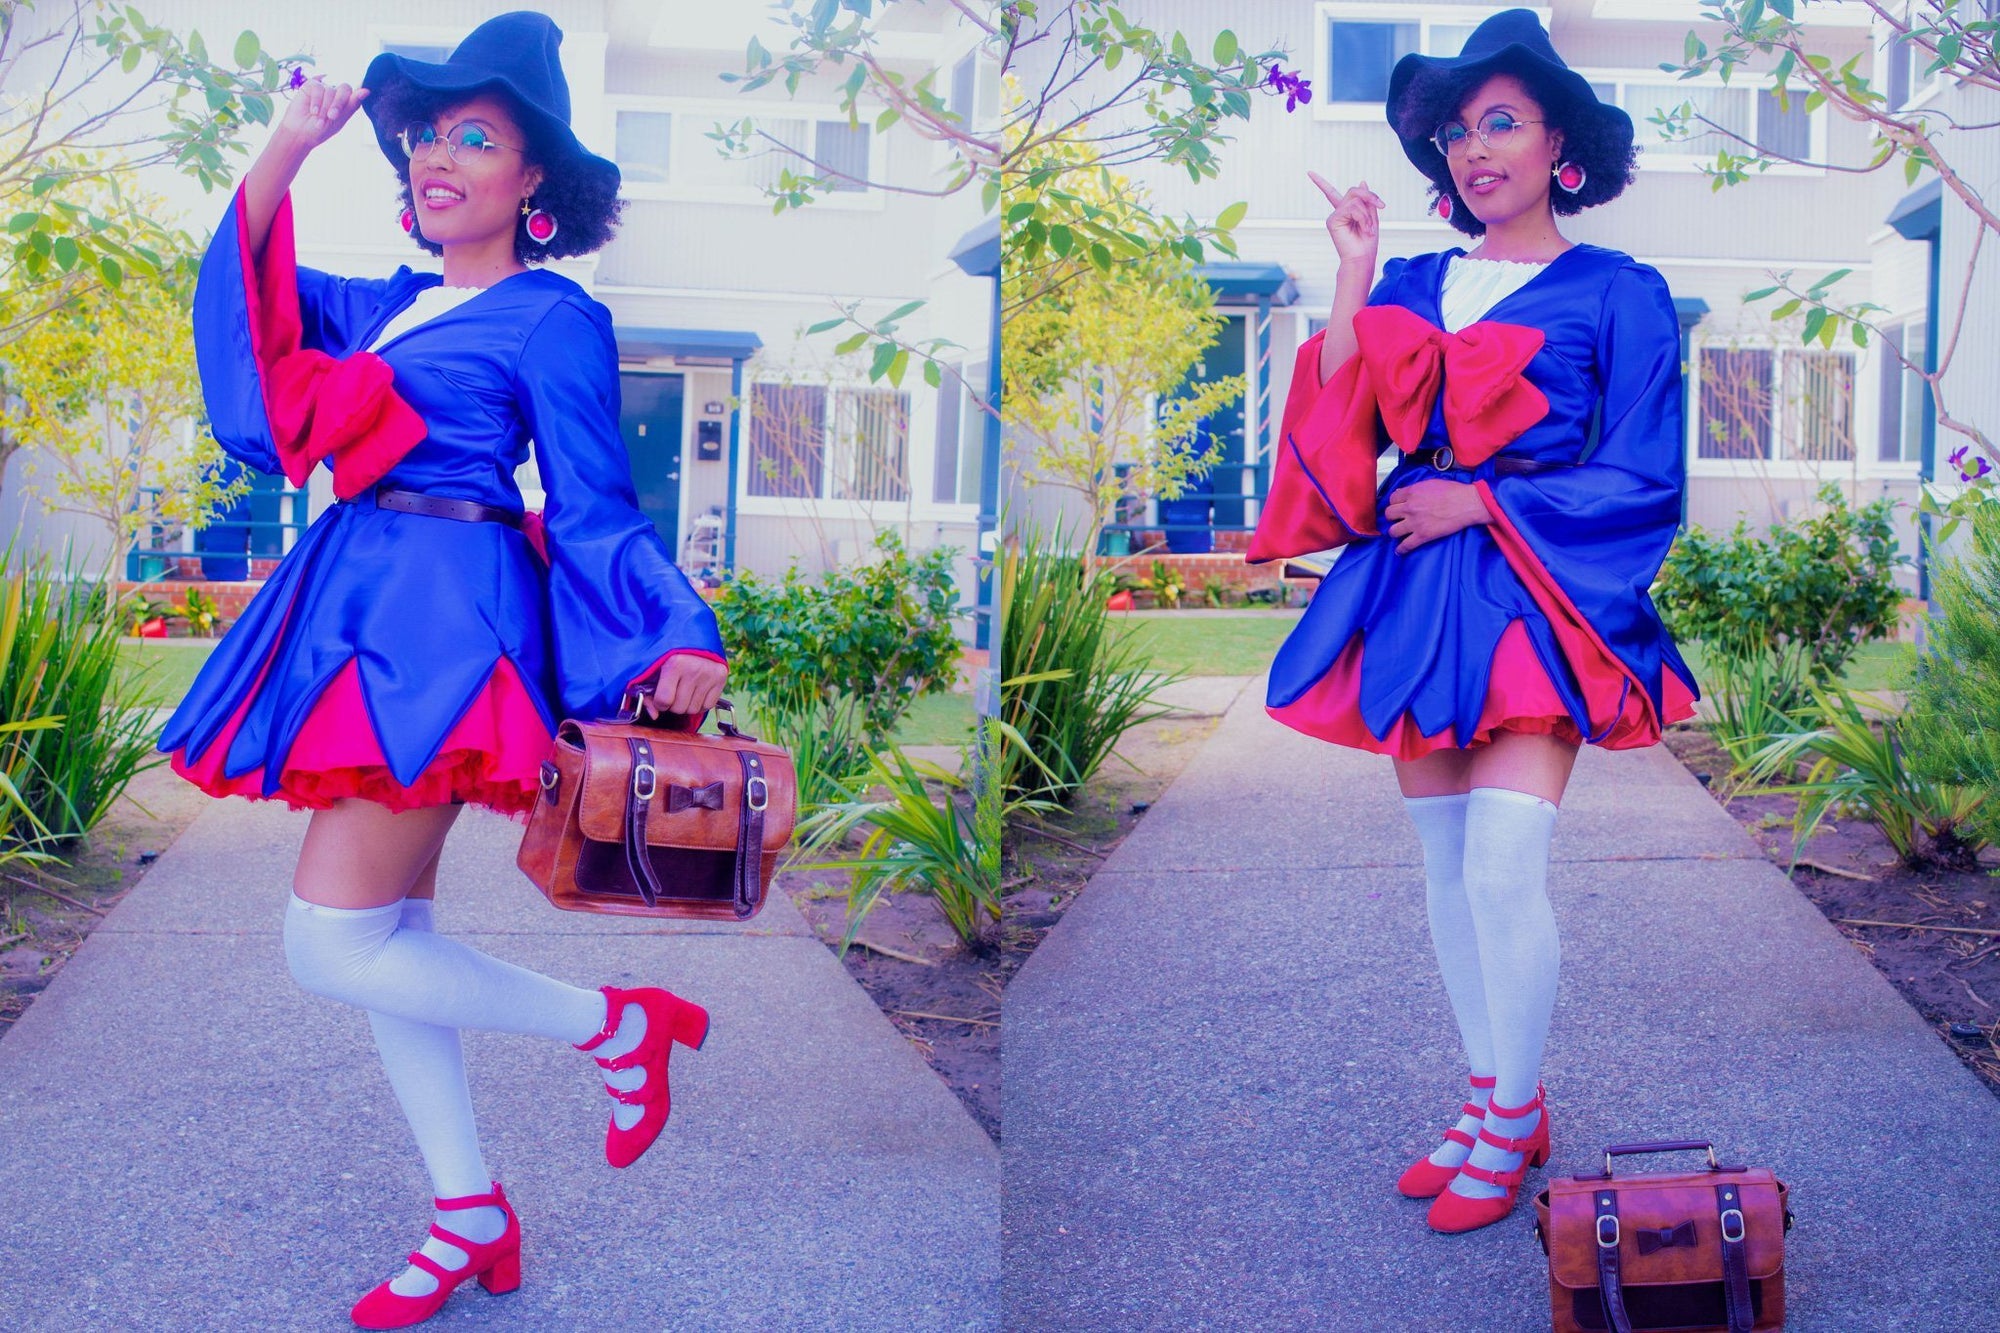
- Voila! You are all set and the final photo of what the ball gown should look like is below!


1 comment
JD
Where does the black crepe back satin come in? I only see red referenced, did you mean for it to be the lining?
I’m also not sure where you got the 6 yards of organza measurement, if it copies the base skirt pattern shouldn’t it be the same yardage that uses?
Where does the black crepe back satin come in? I only see red referenced, did you mean for it to be the lining?
I’m also not sure where you got the 6 yards of organza measurement, if it copies the base skirt pattern shouldn’t it be the same yardage that uses?