White
White
 Pink
Pink
 Red
Red
 Orange
 Ivory
Ivory
 Yellow
 Gold
Gold
 Brown
Brown
 Green
Green
 Blue
Blue
 Purple
 Grey
Grey
 Black
Black
 Multi
Multi
 Abstract
 African Print
 Animal Print
 Baby & Nursery
 Buffalo Check
 Camo Print
 Celestial
 Church
 Damask
 Embroidered
 Floral
 Geometric
 Gingham Check
 Houndstooth
 Licensed
 Paisley
 Plaid
Plaid
 Polka Dot
 Sports
 Stripe
 Tie Dye

A DIY Tiered Ruffle Dress Sewing Tutorial
With the summer season fast approaching it's time to break out the airy dresses and cotton textiles! Nothing feels more fresh than white, and this little white dress is no exception. The design features a tiered ruffle skirt, fitted bodice, and cute shoulder straps with ruffle trim.
The design of this dress is thoughtfully constructed. Instead of darts, the pattern uses princess seams to created a fitted silhouette for any body type. Instead of a zipper closure, an elastic, cinched back was installed. Being able to throw this dress on over your head and flex with your body makes it much more comfortable. It's a little tricky to conceptualize, but all you need is a rectangular piece of fabric and a lot of 1/8" elastic. By sewing strips of elastic on to the rectangle of fabric and stretching them as you sew, you are able to achieve a ruffled look that stretches when thrown over your head.
The skirt is simple to construct, though does take a lot of sewing since you have to make each ruffle tier larger than the last. Don't let the volume of fabric overwhelm you! Each tier is just a long rectangular piece of fabric with two straight stitches through the top. Hold two of the four strings and pull away from yourself to cinch the fabric and create a ruffle.
Two layers of fabric are used throughout the dress to create an opaque look, and the layers have the wrong side of the fabric facing one another so you never have rough sewn edges against your skin. The cotton-poly material was chosen since it doesn't wrinkle as much as the 100% cotton fabric, making this dress vacation packing ready!
Supplies:
- 4 yards 45% cotton 55% polyester broadcloth (58") in white
- 7x(chest/4)" 1/8" elastic
- (Chest/4)" 1/2" elastic
- White thread
- Sewing machine
- Scissors
- Pins
- Measuring tape
- Iron and Ironing Board
Time:
8 hours
Difficulty:
Medium


LET'S GET STARTED!
- Start by measuring around your body under your armpits, around your bust, and around your waist. Cut out your fabric pieces as shown below so you have two layers of everything. You will have 2 CENTER FRONTS, 4 SIDES, 4 BACKS, 2 CENTER BACKS, 4 STRAPS (2" x 18"), 4 STRAP RUFFLES (1" x 30"), 2 TOP TIERS, 2 MIDDLE TIERS, and 2 LOWER TIERS. There are a lot of pieces, but most of them are just simple rectangles!
- Begin by constructing your ruffles for the skirt. Take one piece of the TOP TIER and sew two straight seams across the this edge without back stitching and leave some exposed thread on both ends. Take a thread from each seam and hold on to them as you push the fabric away from you. This will create a ruffle. Do this until your skirt is the measurement of your waist plus 6". Repeat on the other TOP TIER piece.
- Repeat step 2 for the MIDDLE TIERS and LOWER TIERS, making the MIDDLE TIER the same length as the original length of the TOP TIER and the LOWER TIER the same length as the original length of the MIDDLE TIER.

- Place the non-sewn edge of the TOP TIER along the sewn edge of the MIDDLE TIER with the right sides of the fabric touching. Pin the edges together and sew along them to connect the tiers. Do the same for the LOWER TIER lining it up with the bottom of the MIDDLE TIER. Do this twice. Fold each layer of the skirt together with the right sides of the fabric touching, pin the edges together, and sew them to create each layer of the skirt.

- The next step is to work on the bodice. You will be constructing two layers of the top and then assembling them together with one as a lining. Take one CENTER FRONT and lay two of the SIDES on to the edges with the right sides of the fabric touching. Line up the curved edges and pin them together. Do the same with the two BACK pieces, lining them up with the SIDES. You will have five pieces of fabric pinned together. Sew each of these pieces along the pinned edges. Repeat on the other set of pieces to make the second layer.

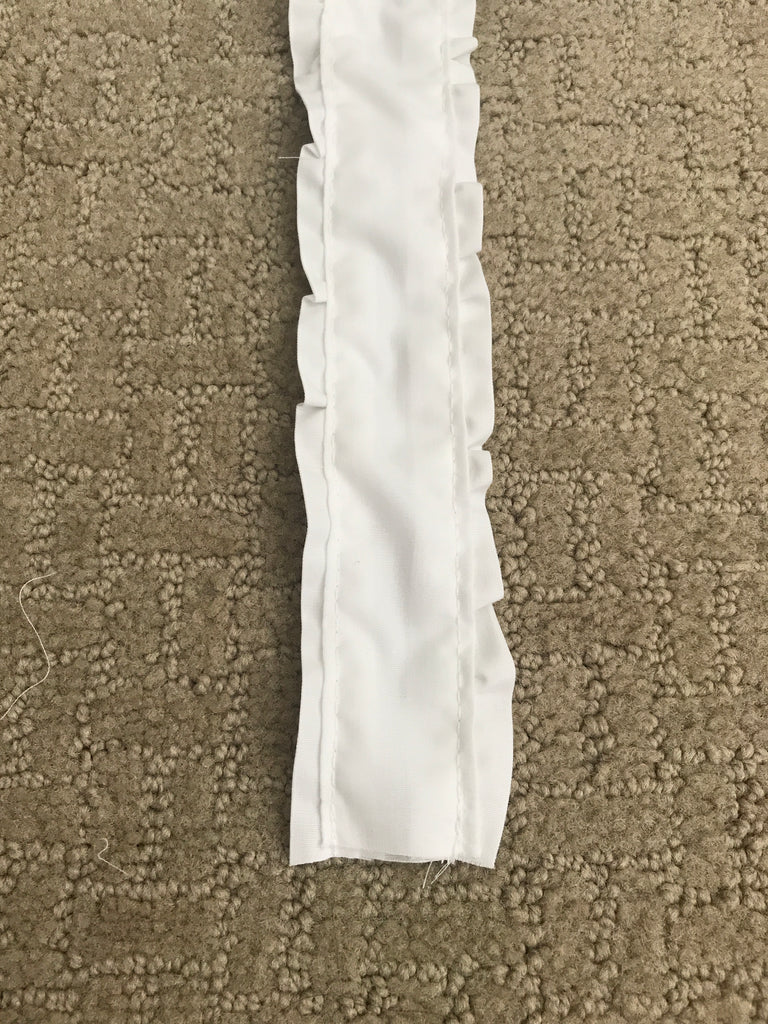
- To create the back section of the bodice, you will be using one strip of 1/2" elastic at the top and 7 strips of 1/8" elastic throughout the rest of the fabric. Take your CENTER BACK pieces and fold them over the top of the 1/2" elastic at the top. Pin one spot at the left side of the elastic. Place the elastic at the pinned spot in your machine and sew along the fabric covering the elastic while stretching out the elastic. This will create a ruffle at the top of the CENTER BACK. Next, pin your strips of 1/8" elastic about 1" apart from each other on the CENTER BACK. Also sew these down while pulling on the elastic. This will create a smocked effect on the fabric.

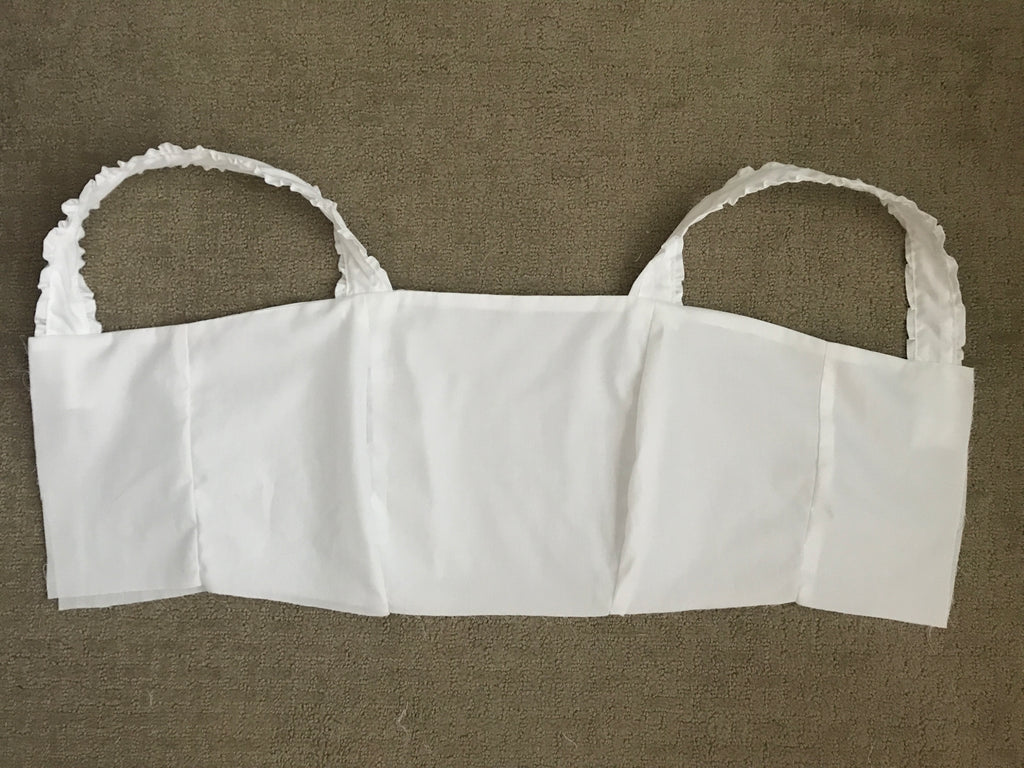
- The last step before putting the bodice together is to create the straps. Take your 4 STRAP RUFFLE pieces and fold and iron them each in half the long way. Take each piece and run a straight stitch through it at the center without knotting the ends. Pull on one of the threads at the end and push it away from you until it is the same length as the STRAP pieces. Take each STRAP piece and fold and iron the edges down about 1/4" on each long side. To assemble the straps, sandwich the STRAP RUFFLE pieces between two STRAP pieces with the non-folded edge inside, pin them together, and sew along the edge of the STRAP to secure.
- To assemble the bodice, lay one layer of the bodice on top of the other with the right sides of the fabric touching. Slide the straps in where the princess seams at the CENTER FRONT and SIDES meet. Pin along the top of the bodice leaving about 1.5" at the ends open on each side. Sew along the pins. Fold the layers of the bodice away from one another to expose the straps. Slide the other end of the STRAPS into the 1.5" openings at the edges of the bodice and sew them in as well. Iron the bodice along the top to secure it in place.

- The last step on the bodice is to add the CENTER BACK in. Line up the edges of the CENTER BACK with the edges of the BACKS with the right sides of the fabric touching. Pin them together and sew along them to secure.

- To attach the bodice to the skirt pieces, line up the top edge of the skirt with the bottom edge of the bodice on the front layer of the bodice with the right sides of the fabric touching. Pin these two layers together and sew. Do the same for the other layers, making a lining with the wrong sides of the fabric touching as they are on the bodice. When you get to the CENTER BACK section, just sew both layers to the bottom edge. Finish by hemming the LOWER TIER on each layer of the dress.


This Tutorial was created by Julia Bleck of Bunny Baubles Blog