White
White
 Pink
Pink
 Red
Red
 Orange
 Tan
Tan
 Beige
Beige
 Ivory
Ivory
 Yellow
 Gold
Gold
 Brown
Brown
 Green
Green
 Blue
Blue
 Purple
 Grey
Grey
 Black
Black
 Multi
Multi
 Abstract
 African Print
 Animal Print
 Baby & Nursery
 Buffalo Check
 Camo Print
 Celestial
 Church
 Damask
 Embroidered
 Floral
 Geometric
 Gingham Check
 Houndstooth
 Licensed
 Paisley
 Plaid
Plaid
 Polka Dot
 Sports
 Stripe
 Tie Dye

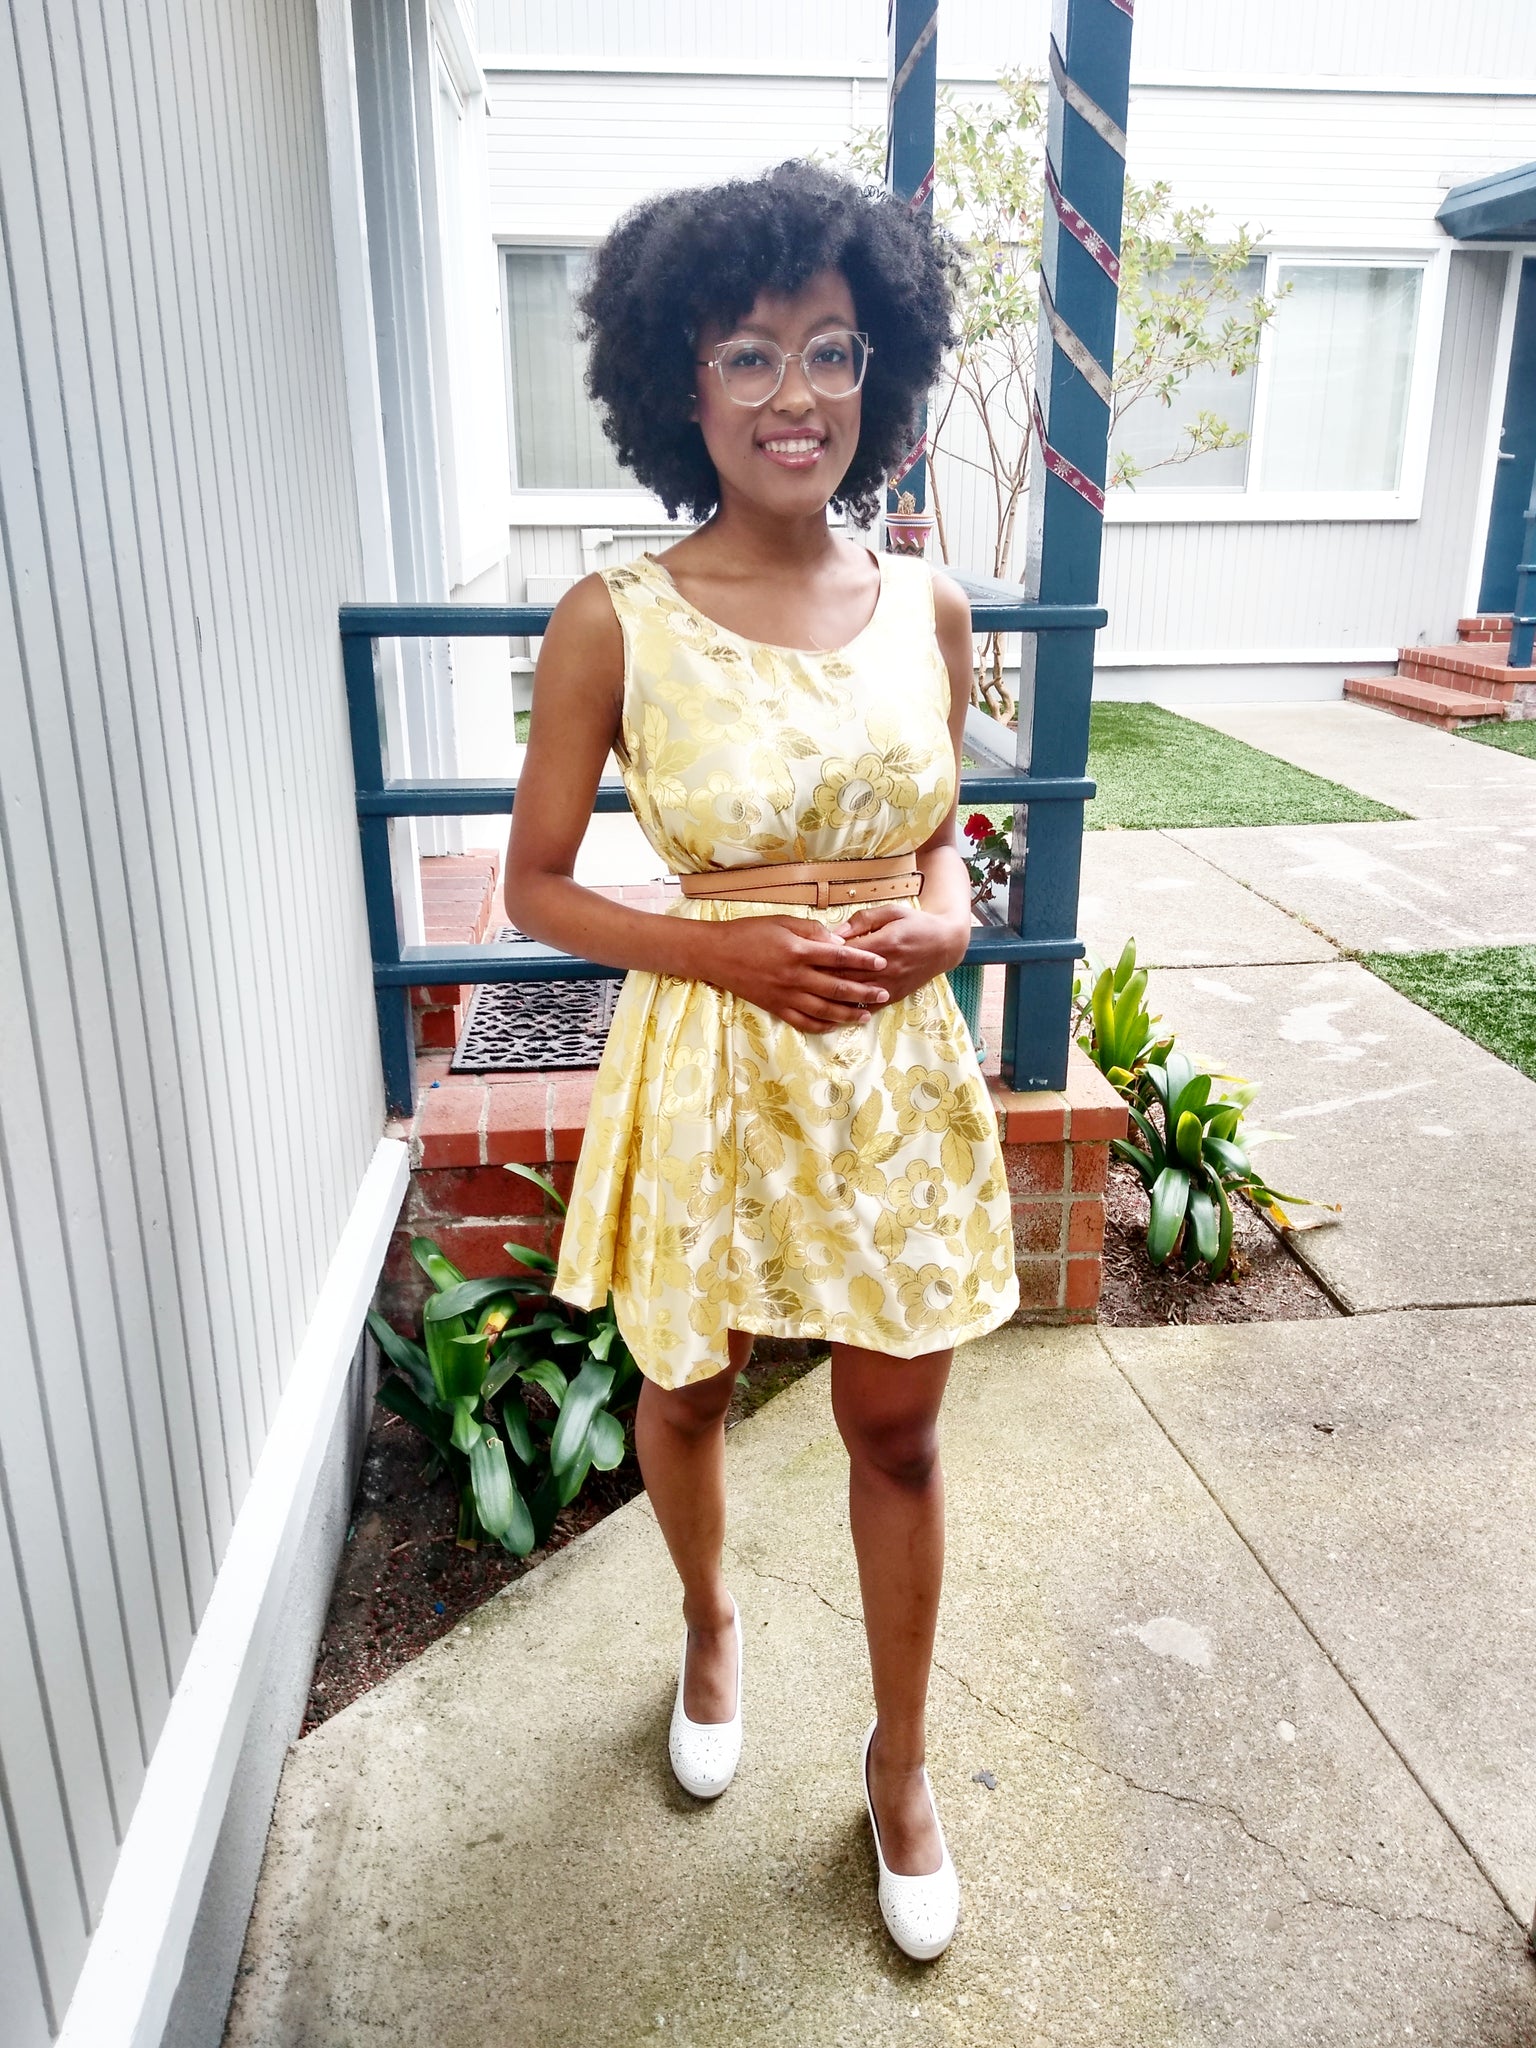
Are you freaking out about what your first sewing project should be or trying to find that perfect outfit for a romantic picnic date with someone special? Well, look no further because I have the best tutorial for you. If you are a beginner like I was when I got my first sewing machine so many years ago. I was overwhelmed by infinite projects, but I didn’t know where to start or how to do it. I wasn’t able to figure what I wanted to make when I realized I couldn’t find the perfect dress for an event I was invited to. That’s when the idea came to mind that I should make my very own dress that I know a store bought dress can’t individualize my ideal clothing choices.
Throughout this tutorial you will be making that summer/spring dress of your dreams through a fun and easy process!
Supplies:
- Simplicity 8383 Pattern ( can get it on Etsy, Joanns, or most fabric stores)
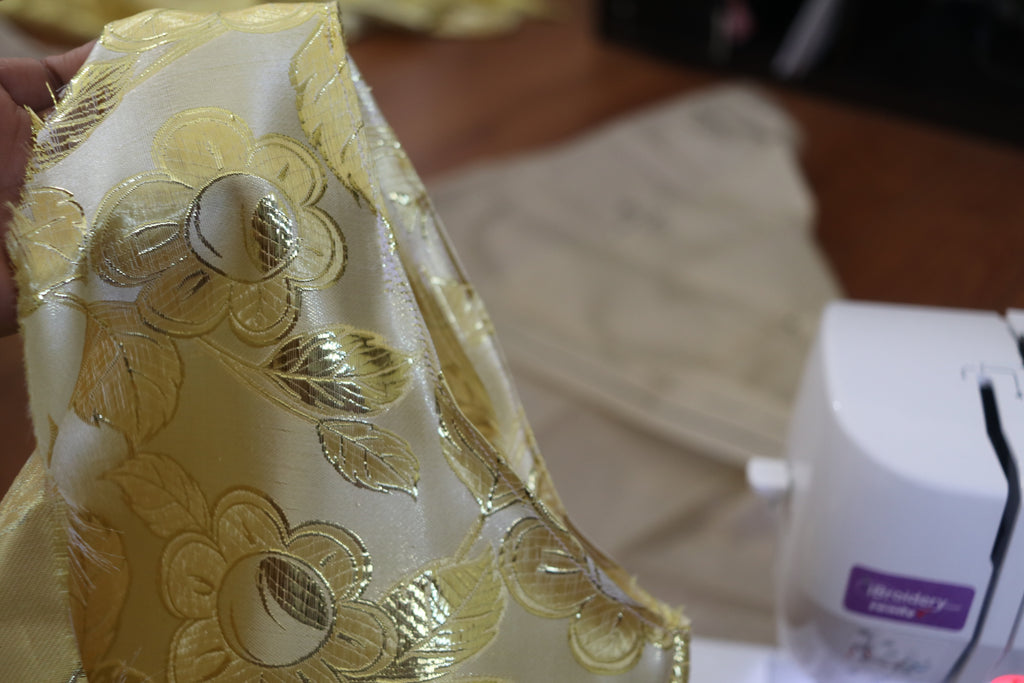
- 2 yards of your favorite fabric ( pattern calls for Knit/stretch only but in the tutorial I will show you how to work around that restriction!) I used the Metallic Daisy Brocade fabric for this tutorial
- Sewing Machine
- Matching thread to your fabric
-
7” Invisible Zipper
Time:
4 hours
Difficulty:
Easy

LET'S GET STARTED!
-
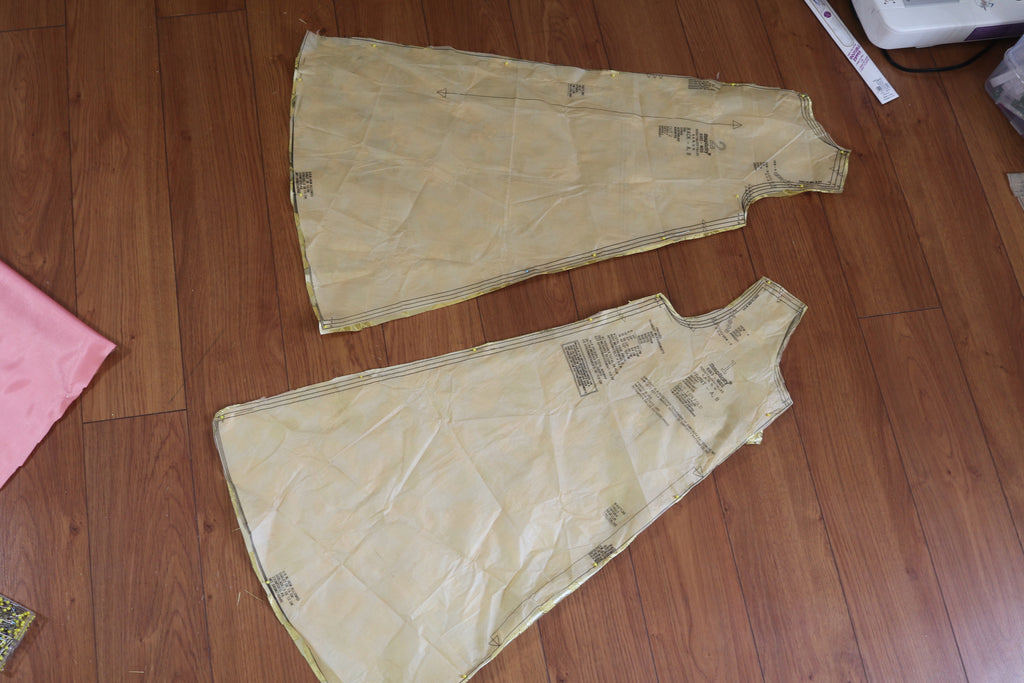
I usually like my dresses sleeveless! So what I did was cut out pattern pieces 1 and 2 and pinned it to the fabric. Be sure to put pattern 1 on the fold. This will be the front of your dress. You’re cutting only one piece of pattern 1, while for pattern piece 2 you’re going to be cutting two pieces. This will be the back of the dress, where you will be adding the zipper!
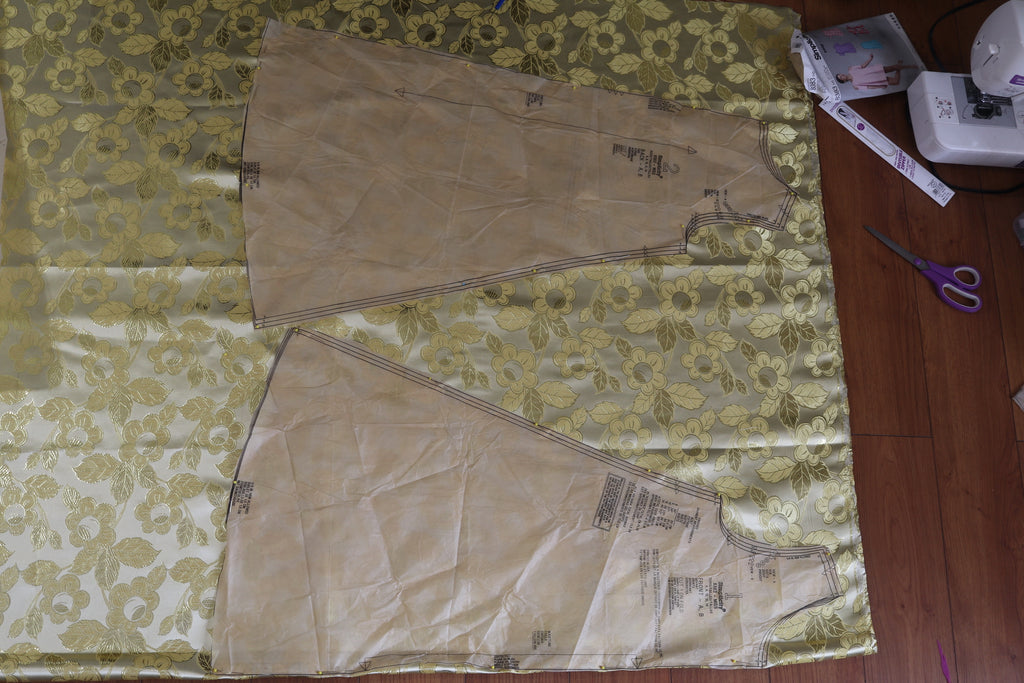
-
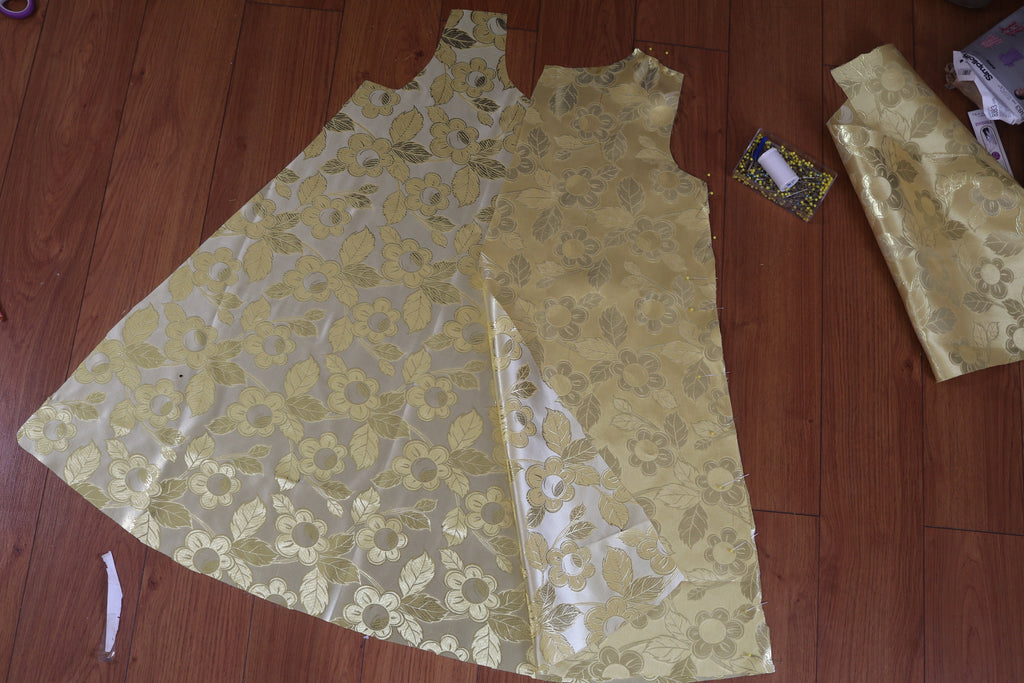
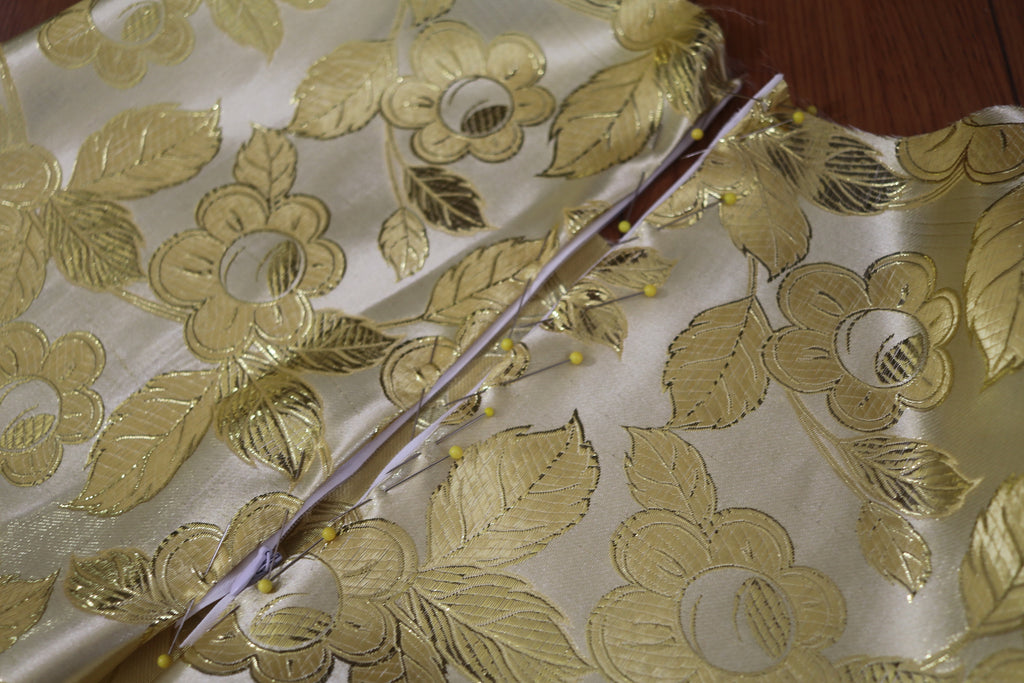
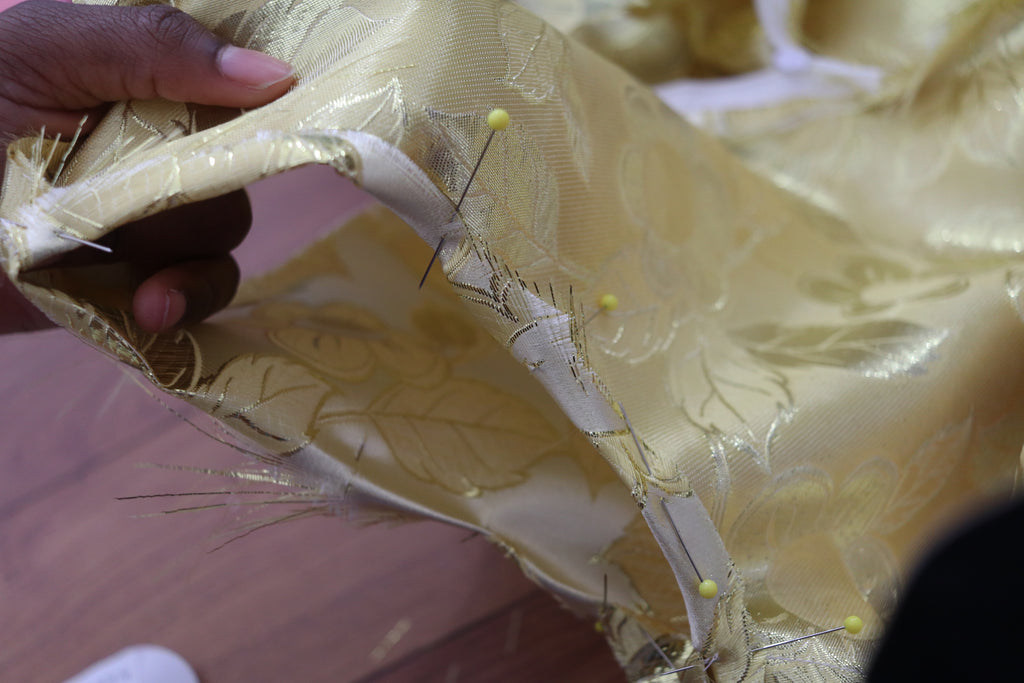
After cutting all the pieces out, you’re going to lay the pattern piece 1 on it’s “bad side” (Side that will show on the inside of the dress). You’re going to then align the pattern piece 2 with the front piece. The “bad side” is going to be facing you! Pin the strap part and the side of the dress together. You’re going to do the same thing for the other side.
-
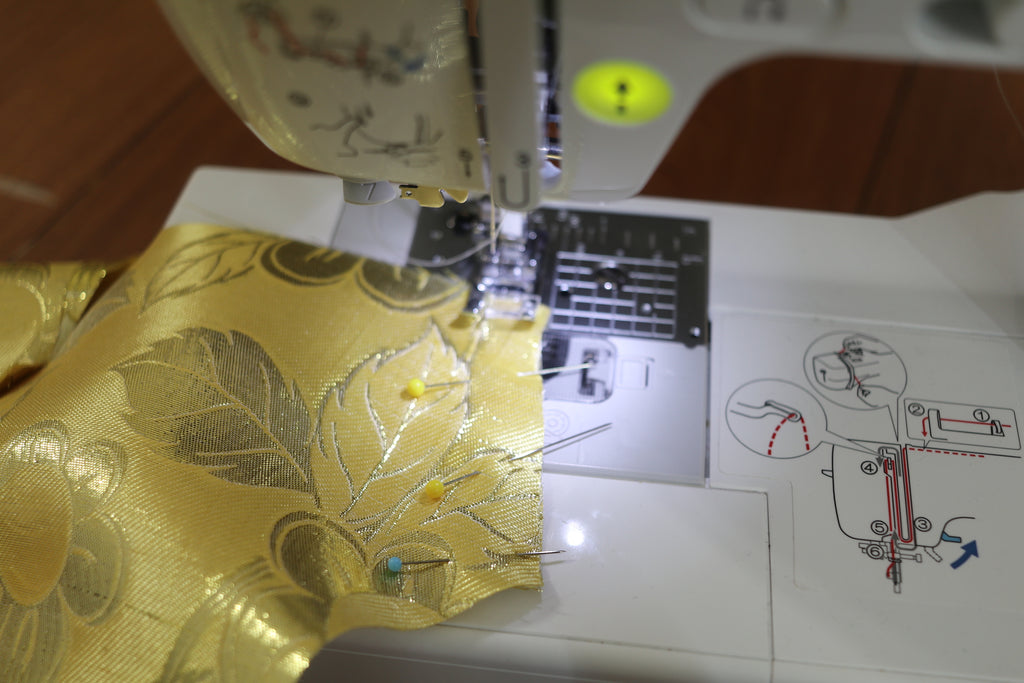
After pinning the straps and side together you’re going to sew them!
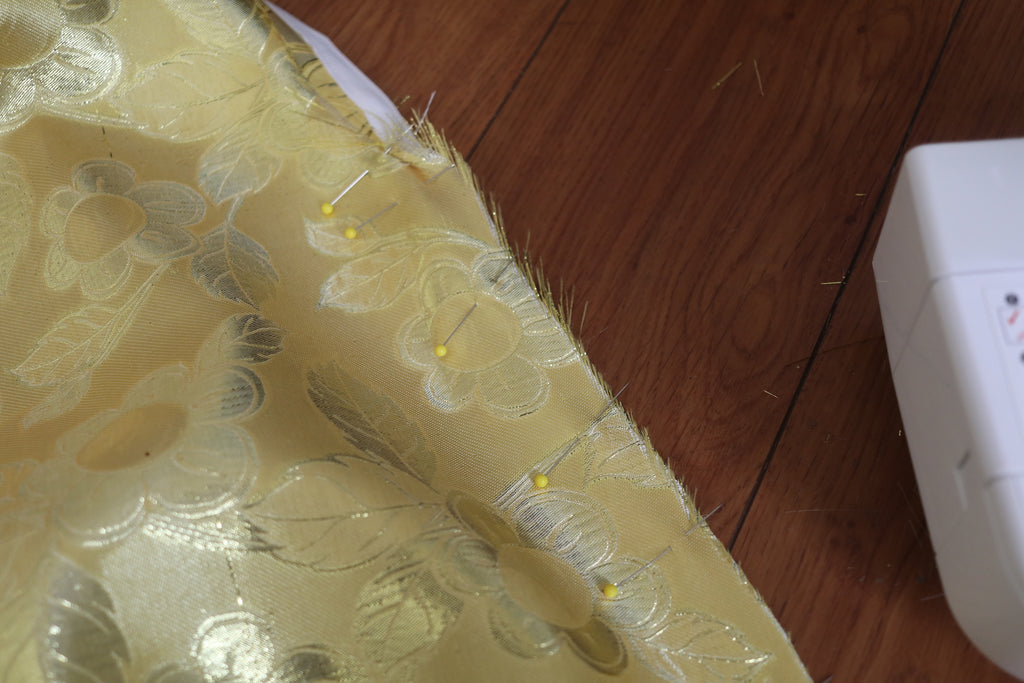
- After sewing everything together, it is time for the zipper! On the back of the dress where both of the back pieces are is where you need to pin the zipper on each side.
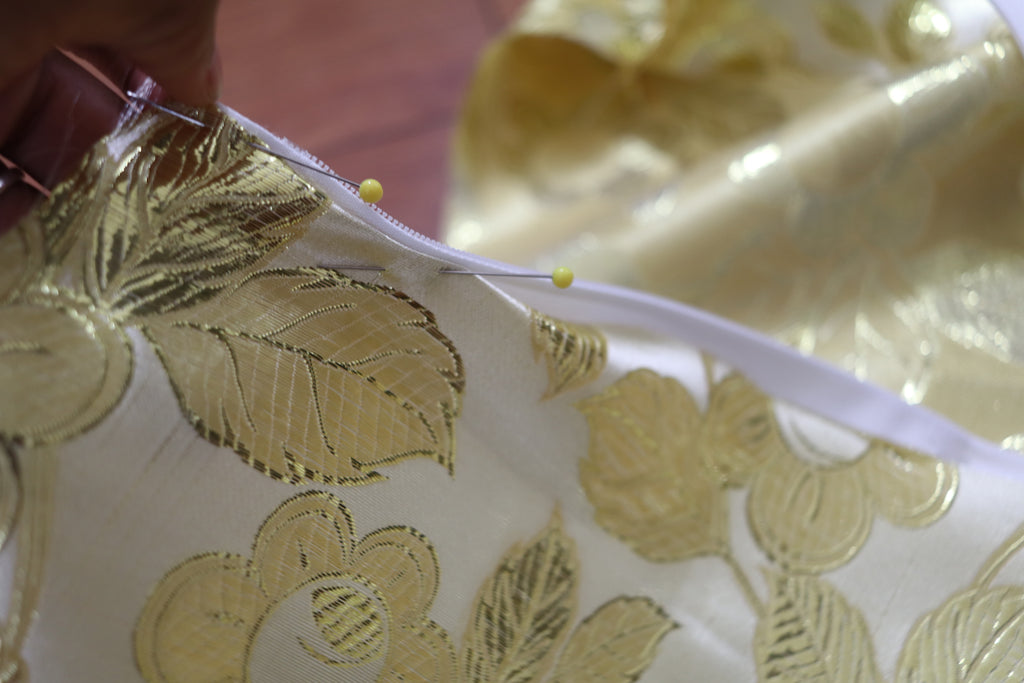
- When the zipper has been pinned, you’re going to finally using your sewing machine to sew it in place.
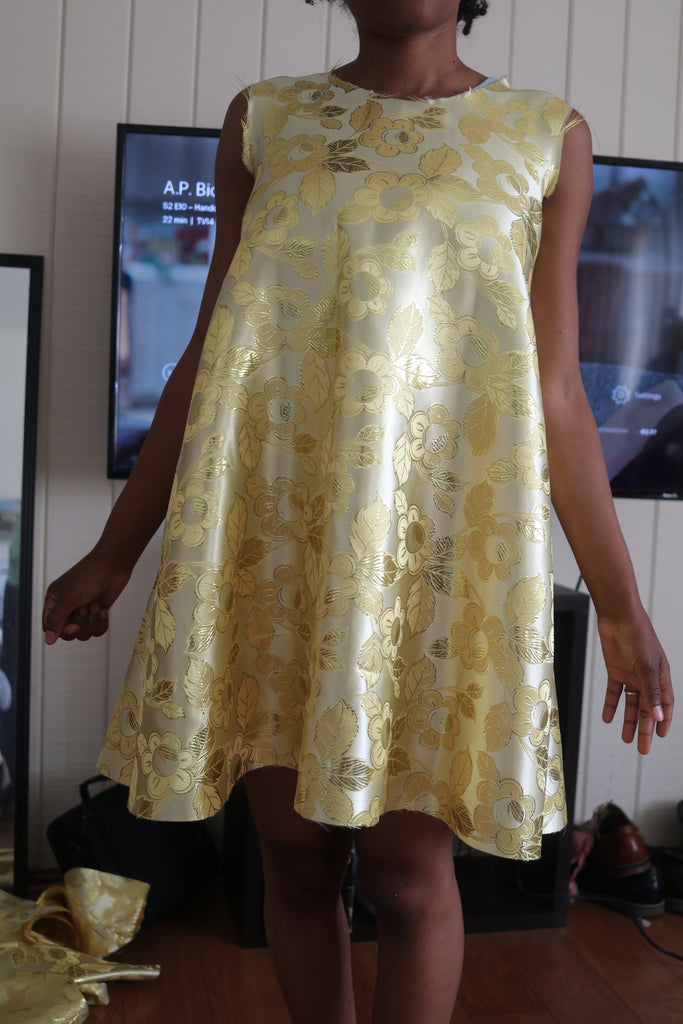
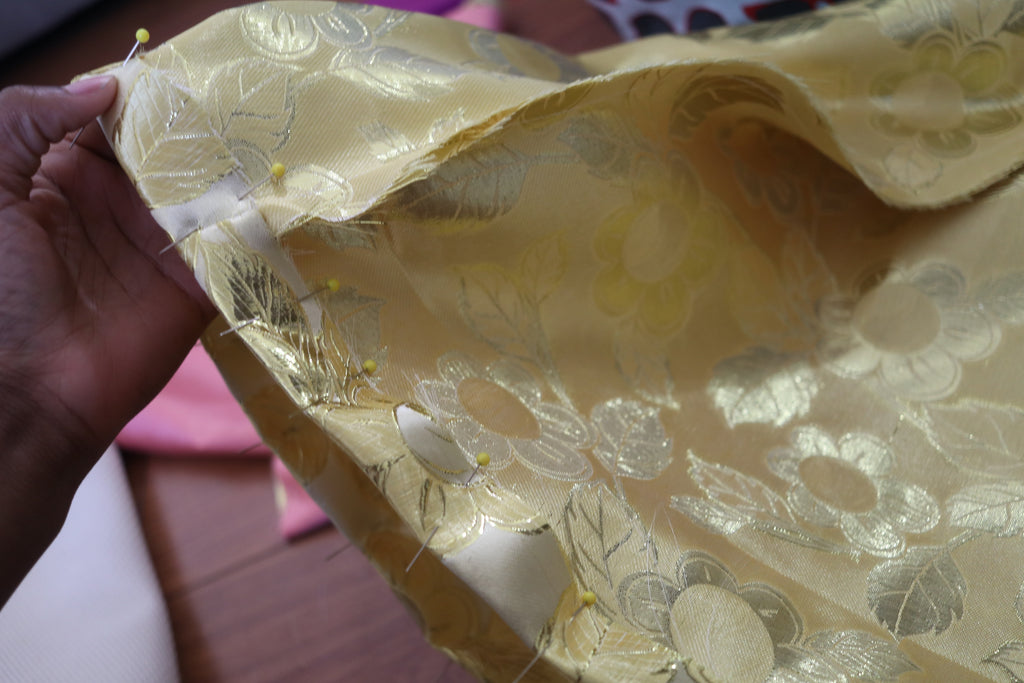
- After the zipper has been sewn on, you’re going to turn the dress inside out and pin the last remaining loose pieces. Usually when I make dresses like these, I sew the final back edges at a curve! So it can still be flowy.
- If you’ve been following along to this point, the dress should look something like this! Now it is time to cut a slightly bigger armhole for yourself.
-
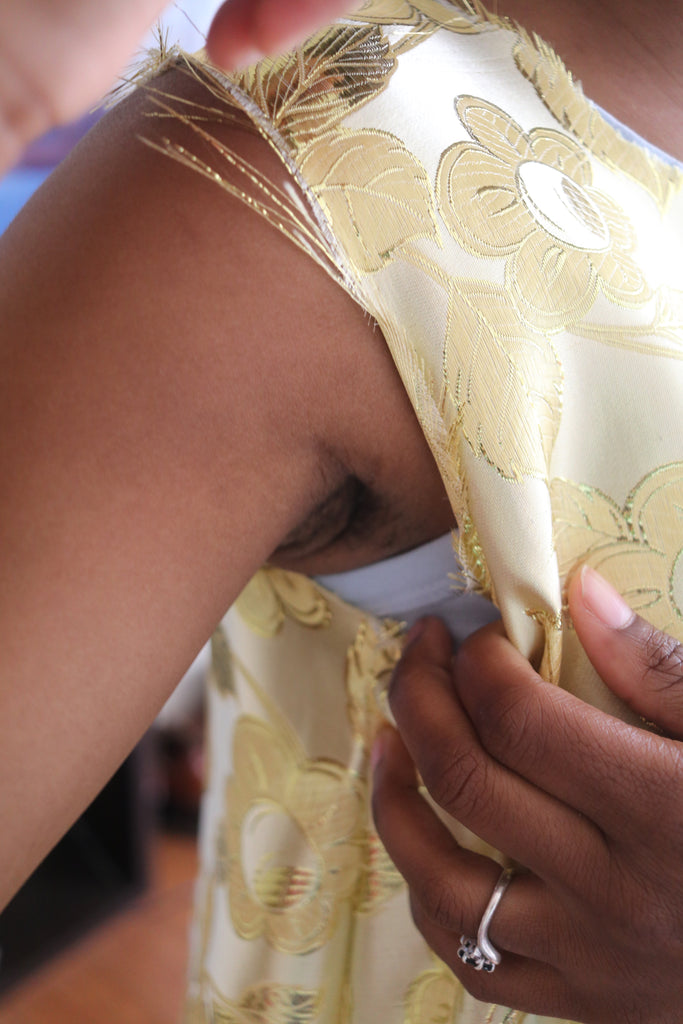
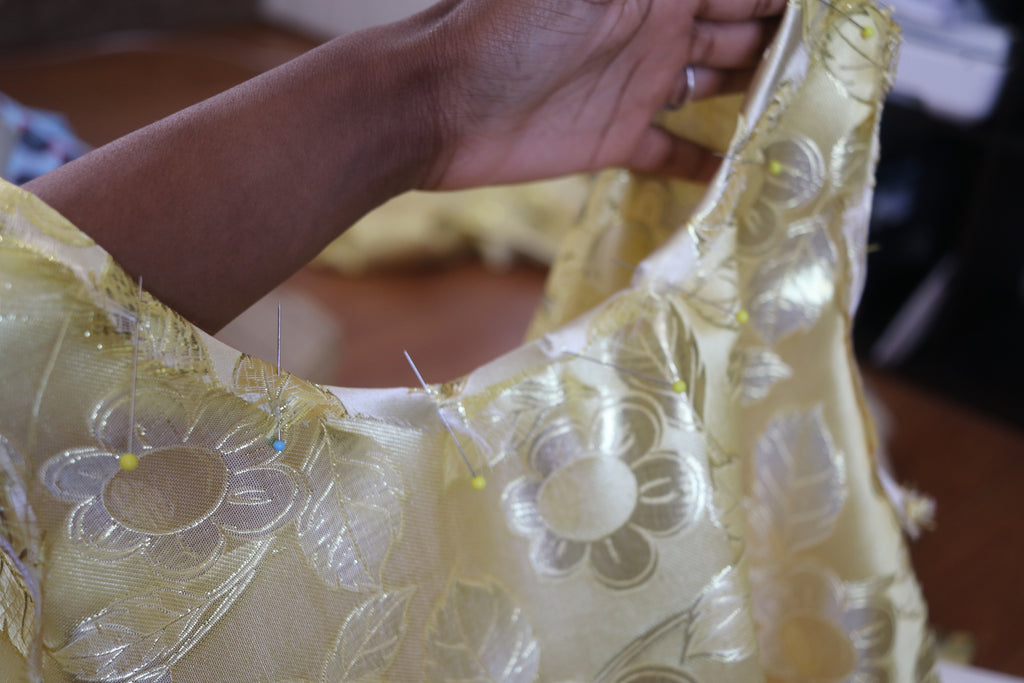
It’s best to try on the dress so you can better gauge on how much space you will want for your arms. See how wide you want your armhole to be. Mark with a pen or marker where you will want the armhole to end.
-
When you figure out how big you want it, you’re going to take off the dress and use your scissors to cut along the arm hole down to where you marked it.

- Finally, you’re going to hem around armhole, be sure to be careful because some brocades might be delicate and unwoven while you pin.
-
After you’ve finished pinning and sewing, the armhole should look like this!
-
The last step for making the dress is hemming the bottom and the top of the dress! For the top of the dress I hemmed it a little under an inch. Usually I just free hand how far I want the hem to be. I did the same thing for the bottom of the dress but instead of hemming under an inch, it was more like an inch.
Top it with a belt you have at home and you’re ready to go out into the town!