 White
White
 Pink
Pink
 Red
Red
 Orange
 Tan
Tan
 Beige
Beige
 Ivory
Ivory
 Yellow
 Gold
Gold
 Brown
Brown
 Green
Green
 Blue
Blue
 Purple
 Grey
Grey
 Black
Black
 Multi
Multi
 Abstract
 African Print
 Animal Print
 Baby & Nursery
 Buffalo Check
 Camo Print
 Celestial
 Church
 Damask
 Embroidered
 Floral
 Geometric
 Gingham Check
 Houndstooth
 Licensed
 Paisley
 Plaid
Plaid
 Polka Dot
 Sports
 Stripe
 Tie Dye

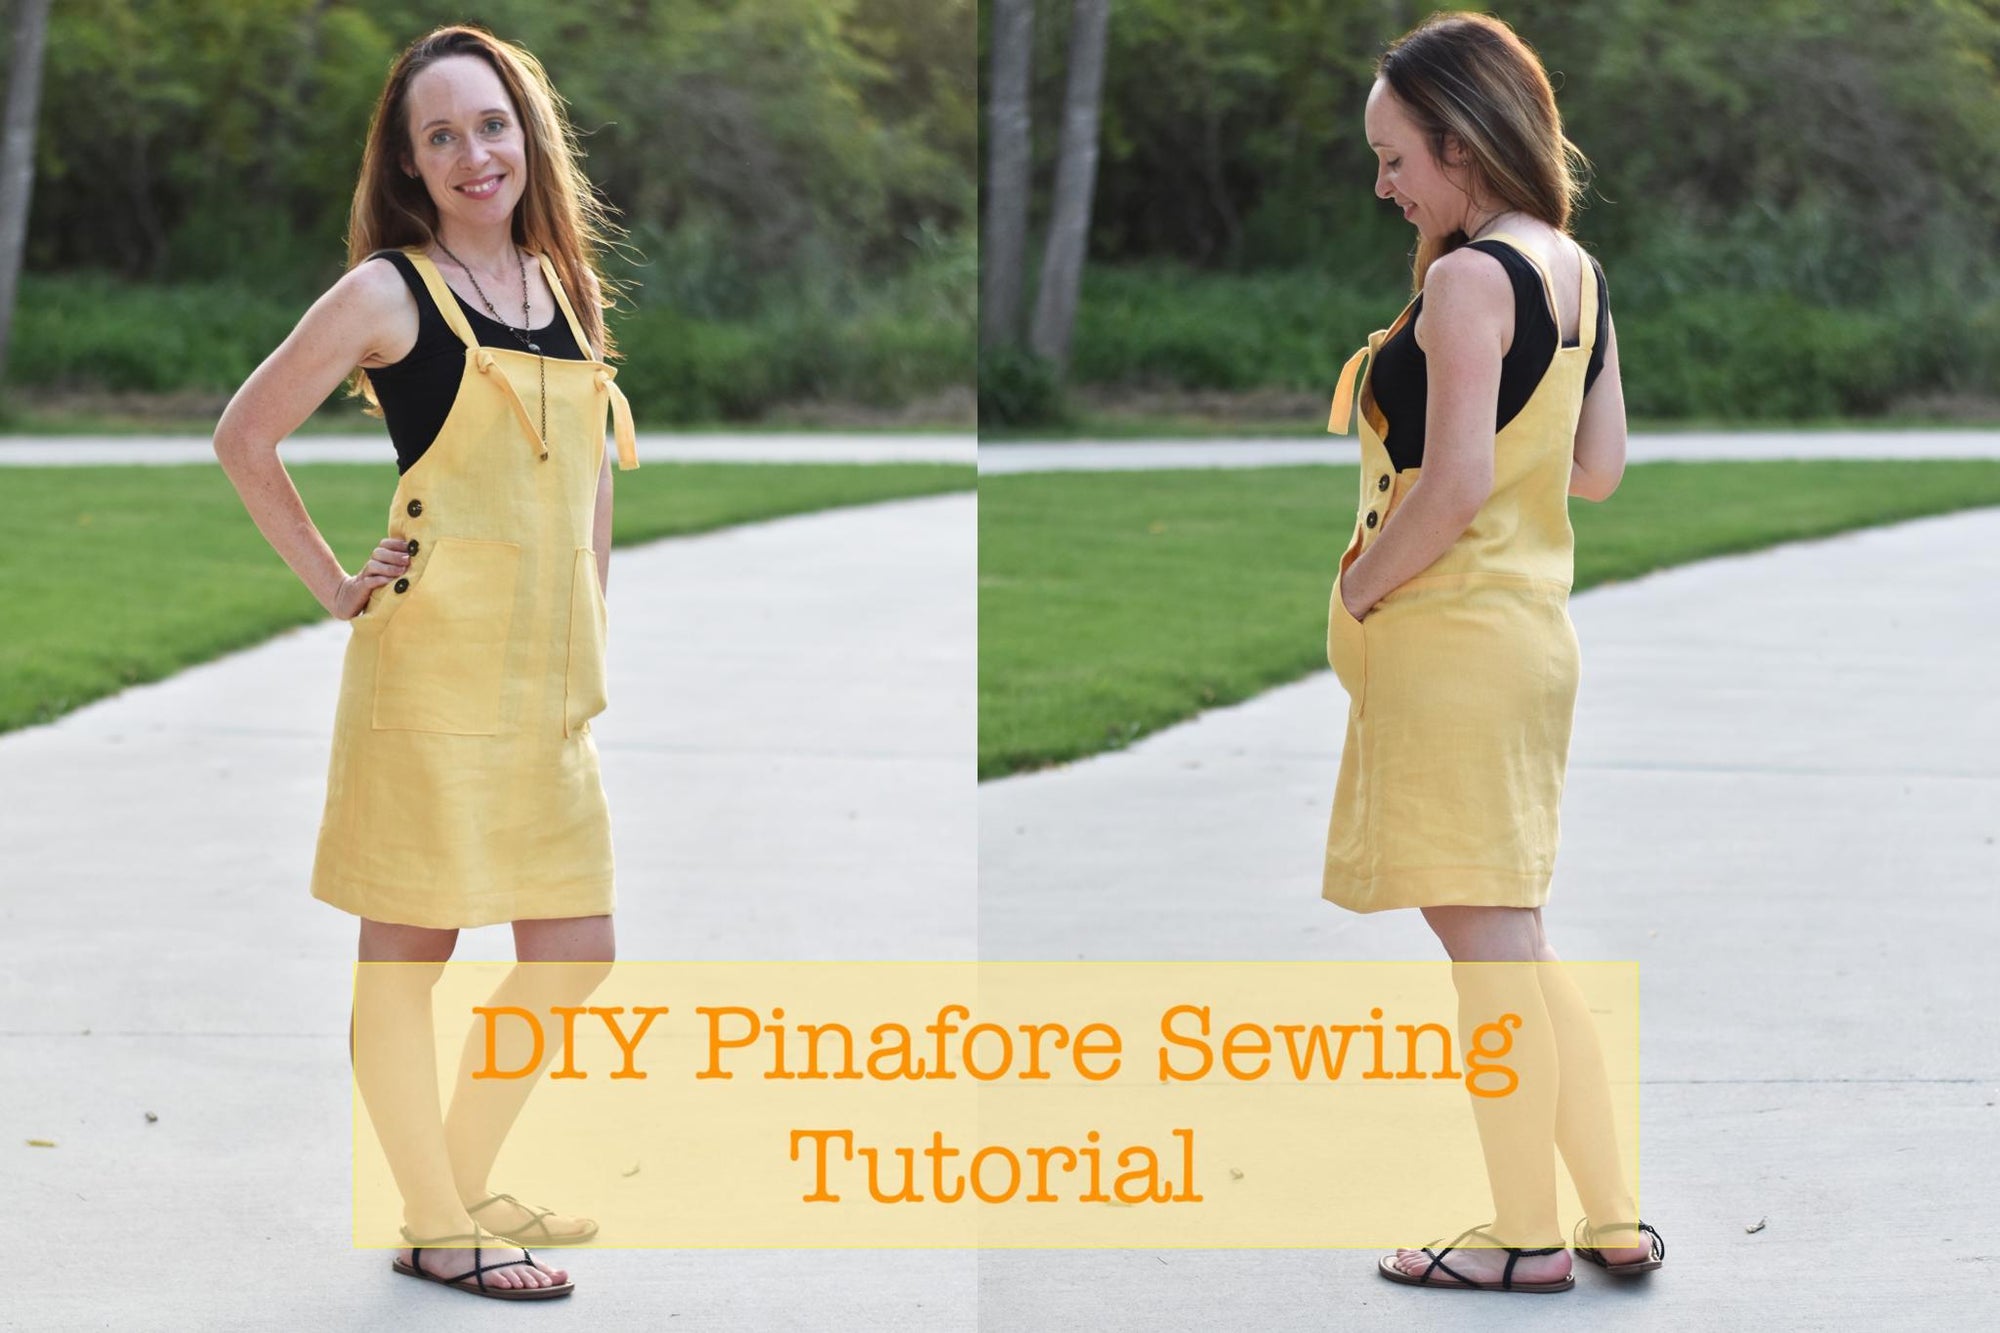
Whether you're looking to upgrade your nighttime wear or outfit a group of bridesmaids, matching pajama sets are a great option. The look is polished and sophisticated, but also incredibly comfortable. The great thing about matching sets is that they can be made with a variety of fabrics in a variety of styles. Long sleeves, short sleeves, pants, shorts, piped, plain, pocketed... the list goes on and on!
For this sewing tutorial, we will be making shorts and a short sleeve top with piping all along the hems and down the collar. The bright, patterned Kendall Pink Print Broadcloth is the perfect fabric for this project since it is colorful for Summer, while also being incredibly light and breathable for sleeping on a hot night. The shorts have pockets too! Who doesn't love pockets?
The design is based on the Butterick Lisette B6296 pattern, pieces A and C, with a few alterations. The amount of piping has been increased from the pattern since it follows the entire collar line. The pockets on the top have been removed and the length of the top shortened. The buttons are also staggered differently from the original pattern. Take a look at the instructions below!
Supplies:
- Butterick Lisette B6296 Pattern in your size
- 3 yards of Kendall Pink Print Broadcloth
- 5 yards Piping Trim
- 1 yard Fusible Interfacing
- 4 3/4" White Buttons
- 1 1/4 yards of 1" Elastic
- White Thread
- Pins
- Measuring tape
- Sewing Machine
- Zipper Presser Foot
- Button Hole Presser Foot
- Button Presser Foot
- Iron and Ironing Board
Time:
8 Hours
Difficulty:
Medium
LET'S GET STARTED!
- Fold your fabric in half the long way and pin down your pattern pieces as shown. You should be using pieces 2-7 and 12-17, plus 19. Cut out all of the pieces. Fold your fusible interfacing in half the long way and pin pattern pieces 4 and 5 to it. You should have one piece 4 and 2 piece 5's. Cut out each of the pieces.

- Iron fusible interfacing pieces 4 and 5 to each of the fabric pieces 4 and 5 to adhere them together.
- Take your piping trim and line it up with the top of the curve on piece 2 all the way down to the bottom edge with the piping open edge lined up with the edge of the fabric. Sew right along the piping edge using a zipper presser foot.

- Line up both piece 2's with piece 3 at the shoulders and along the sides with the right sides of the fabric touching. Sew them together to create the bodice.

- To create the collar, take the piece 4 without interfacing on it and line up the piping from corner to corner along the curved edge on the right side and sew along it using the zipper presser foot. Take the other piece 4 with interfacing and lie it on top of the other piece 4 with the right sides touching. Sew along the same seam line from the piping. Cut 1/2" snips into both pieces at the triangles on both of the collar pieces and fold one of the flaps back. Turn the collar right side out.
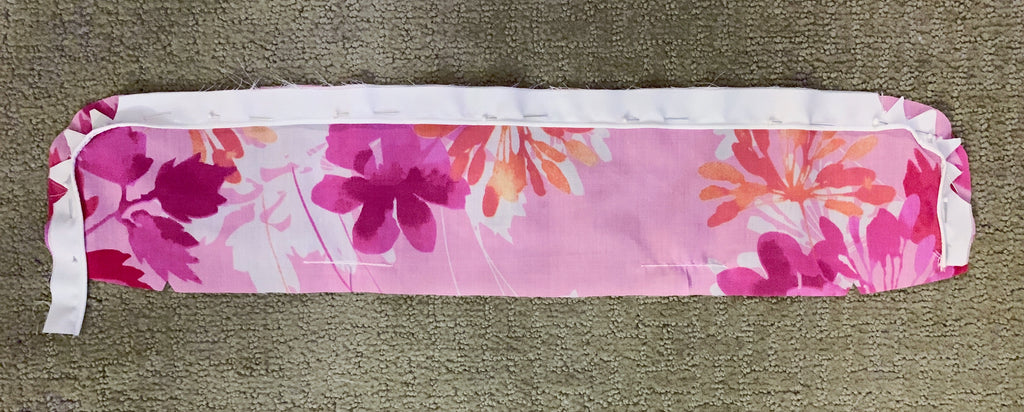

- Take the collar and line it up with the top of the bodice with the piece with the flap folded back on top. Sew along the straight edge, only sewing through the back flap.

- Take each piece 5 and fold the top edge down 5/8" and sew. Trim the edge to 3/8". Line up piece 5 with the bodice with the right sides of the fabric touching. Sew along each edge where you attached the piping earlier to connect them. Turn each piece 5 to the inside.

- Take the flap from the collar and fold it up inside of the collar. Fold the other flap over this and pin it down. Pin down the ends of each piece 5. Sew along these edges to close up the neck area.

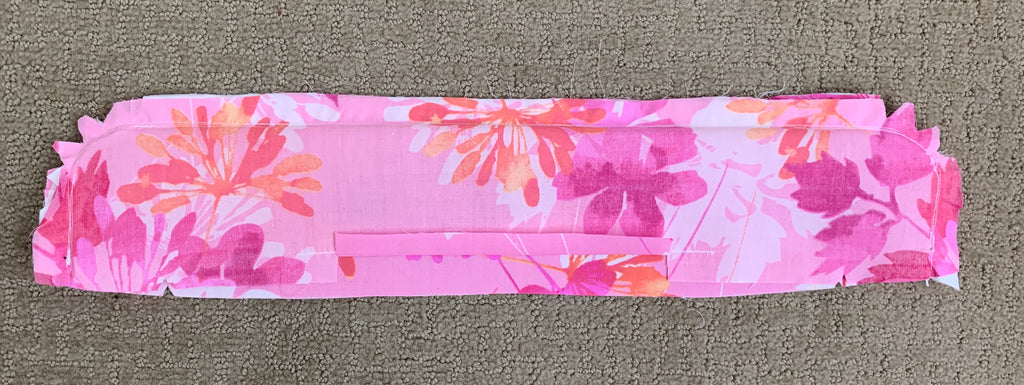
- Make your sleeves by taking each piece 6, folding them in half with the right sides of the fabric touching, and sewing them along the short, straight edge. Do the same with each piece 7. Flip all of the pieces right side out.

- Take each piece 7 and fold it over itself so it makes a doughnut with an opening. Pin piping to the open side of the doughnut and sew it down.

- Place each piece 7 onto each piece 6 with the piping edge along the straight edge of piece 6. Sew along the piping seam to connect them. Fold piece 7 down to reveal your sleeve.


- With the right sides of the fabric touching, line up the curved edge of the sleeve with the opening on the bodice with the seam matching up to the underarm seam. Sew each sleeve on to the bodice.
- To complete the hem, try on the shirt and trim it so that it is 1.25" longer than you want it to be. Turn the front facing back toward the front so the fusible interfacing is showing on the front side. Sew 1" up from the bottom of the interfacing to connect it to the front and trim off the 1" of interfacing, as well as the extra fabric on the entire interfacing seam. Flip the facing back to the inside of the shirt to reveal a clean corner. This should be done on both sides of the shirt.


- Finish the hem by turning up 1/4" of fabric to the inside of the shirt and turn 1" of fabric in again. Iron this down and sew.

- The last step on the shirt is to attach the buttons and make the button holes. Place a pin along each side of the shirt 3.5" from the bottom of the shirt up to the top where the collar turns out for a total of 4 buttons. Use your button hole presser foot to make button holes on the right side and attach buttons on the left side.

- To start the shorts, start by placing piece 12 onto piece 13 with the right sides of the fabric touching. Sew along the curved edge. Turn piece 12 to the back and iron into place. Sew along the curve 1/4" from the edge of the fabric.

- Finish the pocket by pinning piece 14 to piece 12 with the right sides of the fabric touching. Sew along the outside edges to connect them.

- Attach the backside of the shorts to the front by lining up piece 15 with piece 13 on the short side with the right sides of the fabric touching and sew. Take both sewn portions of the shorts and line them up along the inseam. Sew them together and turn the shorts right side out.

- Add the yoke to the back of the shorts by lining up the curved edge of piece 16 with the topside of both 15 pieces, the right sides of the fabric touching. Sew them together. Turn the shorts inside out again and line up the edges of the shorts on the sides and, sew them together.


- Create the waistband of the shorts by lining up each piece 17 with the right sides of the fabric touching and sew along the short sides. Fold the loop up onto itself to make a doughnut shape, slide it over the top of the shorts, and sew along the topside to close it, leaving just an opening at the seam line for the elastic.

- Insert the elastic into the opening and thread it through until it comes out the other side. Sew the elastic together using a zig zag stitch and then close up the hole.

- Create the leg bands for the shorts very much like Steps 10-12 by taking each piece 19, folding it in half, and sewing along the short ends. Fold the loop up onto itself to make a doughnut shape. Line up the last pieces of piping to the opening on the doughnut shapes and sew it down. Slide each doughnut onto a leg of the shorts and attach them by sewing along the piping seam. Fold the leg band down, and you're done!


This Tutorial was created by Julia Bleck of Bunny Baubles Blog
2 comments
Charles G. Humes
Your DIY Matching Pajama Set with Piping Sewing Tutorial is so helpful! I was a bit intimidated by the idea of making my own pajamas, but your tutorial broke it down so well. The piping detail really adds a professional touch, and the Butterick Lisette B6296 pattern you used as the patternmaking for fashion design is such a great choice. Love that you added a bit of your own touch and I can’t wait to do my version. Thanks for the inspiration and guidance!
Your DIY Matching Pajama Set with Piping Sewing Tutorial is so helpful! I was a bit intimidated by the idea of making my own pajamas, but your tutorial broke it down so well. The piping detail really adds a professional touch, and the Butterick Lisette B6296 pattern you used as the patternmaking for fashion design is such a great choice. Love that you added a bit of your own touch and I can’t wait to do my version. Thanks for the inspiration and guidance!
Chritopher
Your Matching Pajama Set with Piping Sewing Tutorial is so helpful. It makes me enthusiastic about the whole process. I was a bit intimidated by the idea of making my own piping, but your blog post broke it down beautifully. The detail really adds a professional touch, and the Butterick Lisette B6296 pattern you used as the clothing patterns is perfect. Love that you added a bit of your touch and I can’t wait to do mine. Thanks for the inspiration and guidance!
Your Matching Pajama Set with Piping Sewing Tutorial is so helpful. It makes me enthusiastic about the whole process. I was a bit intimidated by the idea of making my own piping, but your blog post broke it down beautifully. The detail really adds a professional touch, and the Butterick Lisette B6296 pattern you used as the clothing patterns is perfect. Love that you added a bit of your touch and I can’t wait to do mine. Thanks for the inspiration and guidance!