White
White
 Pink
Pink
 Red
Red
 Orange
 Tan
Tan
 Beige
Beige
 Ivory
Ivory
 Yellow
 Gold
Gold
 Brown
Brown
 Green
Green
 Blue
Blue
 Purple
 Grey
Grey
 Black
Black
 Multi
Multi
 Abstract
 African Print
 Animal Print
 Baby & Nursery
 Buffalo Check
 Camo Print
 Celestial
 Church
 Damask
 Embroidered
 Floral
 Geometric
 Gingham Check
 Houndstooth
 Licensed
 Paisley
 Plaid
Plaid
 Polka Dot
 Sports
 Stripe
 Tie Dye

Cosplay Meets the Gym Inspired DIY Sewing Tutorial
Being home bound right now doesn't mean you have to stop cosplaying! it just means you have to get more creative with how & when you do it. What better way to do that than with some cosplay inspired active wear so that you can reach those fitness goals while showing love to your favorite heroes or villains!
Supplies:
- 4 yards of spandex fabric in your contrast color choices
- Simplicity 8632 Harley Quinn (But check out pattern D0948, D0950, D0951 for other DC characters!)
- 1 1/2 yard of 1 1/2" wide elastic
- Tape measure
- Sewing pins
- Fabric scissors
- Thread that matches your dominant fabric
- Sewing machine or serger
Time:
6 hours
Difficulty:
Intermediate
LET'S GET STARTED!
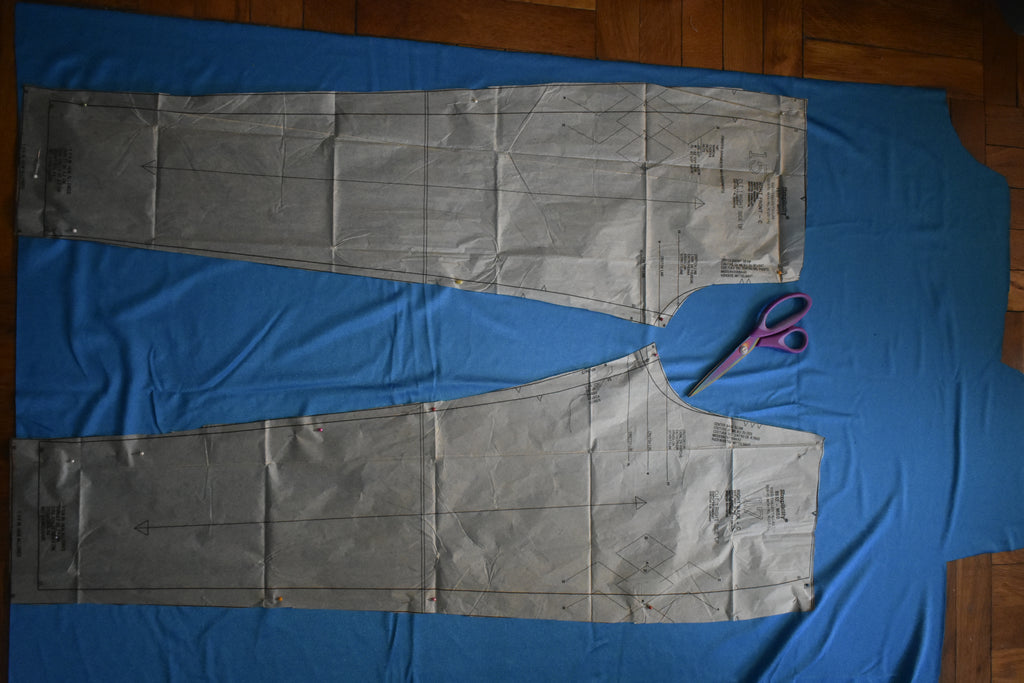
- Take your bust, waist, hip, and back neck- waist measurements to figure out what size pattern is best for you. Cut out the pattern pieces following the cutting guidelines as provided on the instruction sheet. I used pattern pieces 9,10,11,12,14,15,16,17,18,19,20, & 21

2. Starting with the top you will stitch piece 10 to piece 9 with the right sides together.

3. Now you will take your sleeve pieces (11) and apply your appliques (12). Once you have done this you will sew your sleeve pieces right side together forming the sleeves. Turn them inside out and hem both sleeves.

4. You will attach the sleeves to the top by turning it right side out and attaching it to the top with the wrong side out. Carefully pin the sleeve to the armhole edge matching the seams accordingly. After you have completed this step hem the neckline of the top.
5. To apply the waistband to your top you will take piece 14 and hold the band in half wrong sides together and stitch. Then you will pin it to the outside of the lower edge of the top. Carefully stitch stretching the band to fit the top if needed.


6. When making your leggings you will take pieces 15 and 17 and stitch them at the side seams. Follow the same instruction for pieces 16 & 18. Once you have completed this apply your appliques (19) just like in step 3


7. Now you will pin the leggings right sides together and stitch forming your leg casings.

8. To form your pant leggings insert one leg inside the other with right sides together and pin them together at the inner leg seams. Stitch twice to reinforce the stitch.

9. Cut a piece of elastic (piece 21) using the length as noted on the pattern. You will sew your elastic to the yoke (piece 20) straight across the top edge of the elastic. When sewing stretch the elastic so that it covers the entire waistband. Next, you will stitch the center back seam of your yoke right sides together. When this is complete you will fold your yoke wrong sides together and stitch.

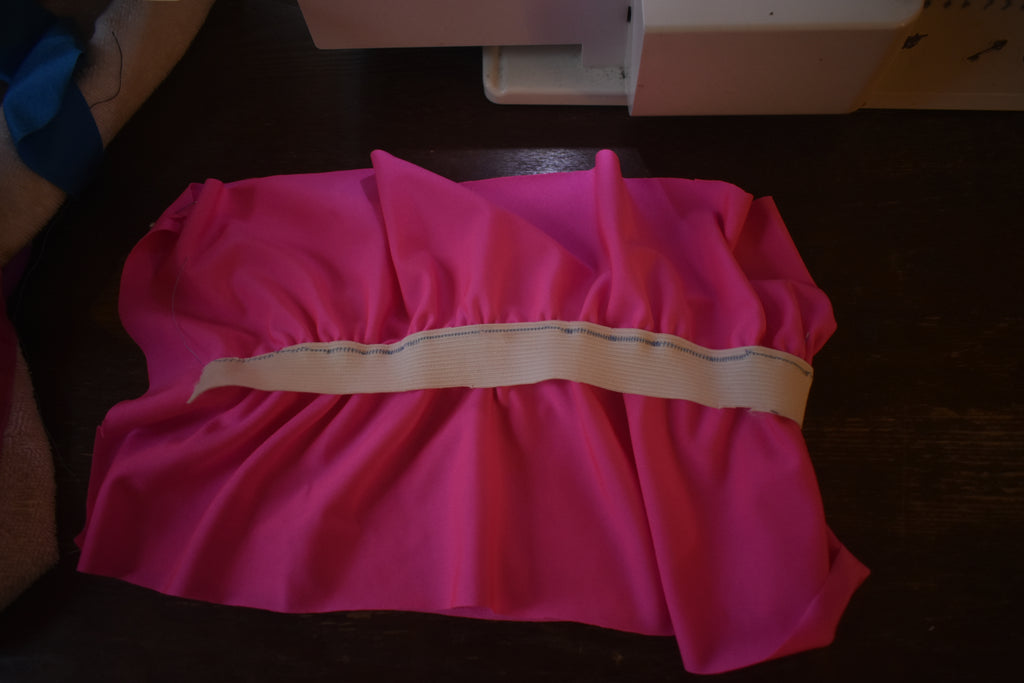
10. With the underside of the yoke facing you carefully pin the yoke to the garment matching the seams accordingly. When pinning stretch the yoke to fit over the top of the pant. Once this is complete hem the bottom of each pant leg and you're done!


Suit up and head to your living room with your yoga mat and your fitness motivation!