White
White
 Pink
Pink
 Red
Red
 Orange
 Tan
Tan
 Beige
Beige
 Ivory
Ivory
 Yellow
 Gold
Gold
 Brown
Brown
 Green
Green
 Blue
Blue
 Purple
 Grey
Grey
 Black
Black
 Multi
Multi
 Abstract
 African Print
 Animal Print
 Baby & Nursery
 Buffalo Check
 Camo Print
 Celestial
 Church
 Damask
 Embroidered
 Floral
 Geometric
 Gingham Check
 Houndstooth
 Licensed
 Paisley
 Plaid
Plaid
 Polka Dot
 Sports
 Stripe
 Tie Dye

DIY Cutoff Cropped Hoodie Sewing Tutorial
As the entire world is cooped up at home, the natural reaction is to wear the comfiest clothes you can find. Most everyone's normal day-to-day wardrobe staples have changed. These days workout clothing, lounge wear, and even PJ's are acceptable - who really cares if you aren't going to be leaving the house! If you don't have anything you really love, why not take this chance to sew it?
In an effort to keep some semblance of normalcy, it's great to put some effort in to your daily look and change out of those pajamas. Yes, they might be comfortable, but looking like a slob can make you feel tired or depressed, and it's important to stay positive in a time like this!
Matching lounge sets, oversized hoodies, joggers, and leggings are the most popular items being shared by influencers these days that are cute and trendy while also being comfortable. One of the easiest trends to recreate at home is the cropped sweatshirt. It looks great with leggings and keeps you warm when you're sitting at your desk working all day. Plus, the length is totally customizable if you don't want to go too short.
You can make this sweatshirt in any color, but the dark grey is shown in this tutorial. The material used is just a cotton jersey, so it's more like a long sleeve tee which is perfect for hanging around the house in. Follow along with the tutorial below to find out how to make this cropped hoodie.
Supplies:
- 2 yards of Cotton Jersey Fabric
- Matching Thread
- Sewing Machine
- Pins
- Fabric Scissors
- Measuring Tape
Time:
3-4 hours
Difficulty:
Easy/Medium
LET'S GET STARTED!
- Start out by cutting out your pattern pieces. You will need a FRONT, BACK, 2 SLEEVES, 2 CUFFS, and 2 HOODS.

- Take your FRONT and BACK and pin together the shoulder sections. Sew along the edges about 3/8" from the edge of the fabric.

- Unfold your FRONT and BACK so the right side of the fabric is up and lay your SLEEVES on top to line up the curved edges of the SLEEVES with the arm hole area on the FRONT and BACK with the rest of the arm overlapping the other fabric. Pin them down and sew the edges about 3/8" from the edge of the fabric.
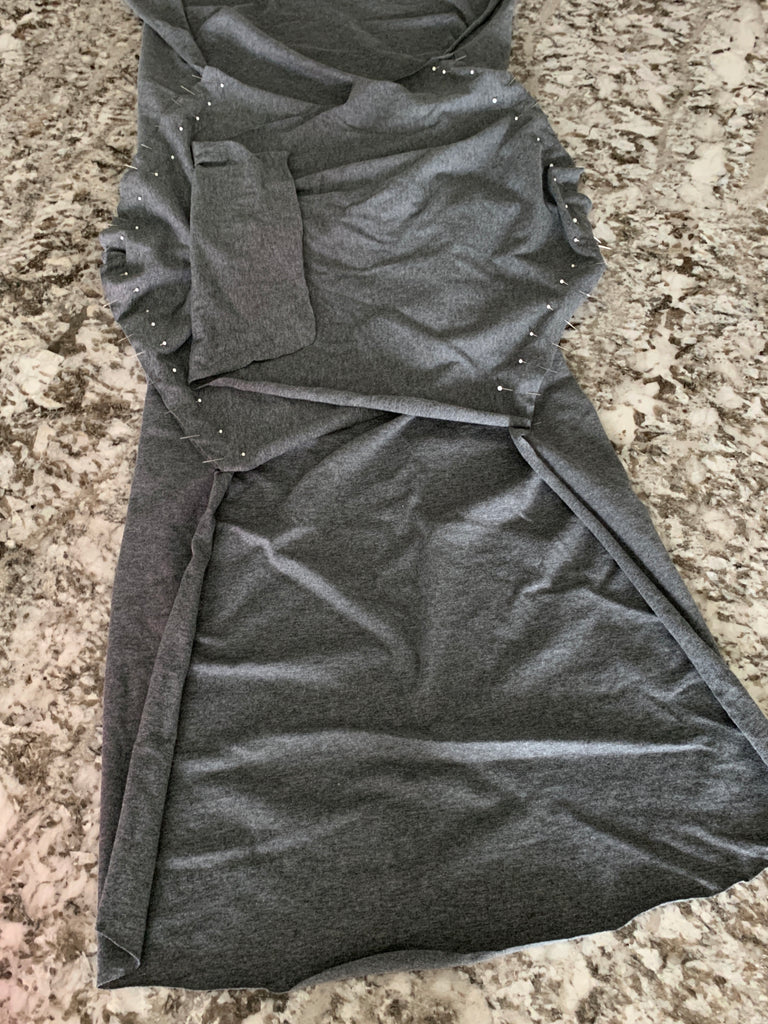
- Take your bodice that you have created and fold it so that the FRONT and BACK are touching again and the SLEEVES have folded over themselves. Line up the bottom of the SLEEVES and the sides of the bodice and pin along them. Sew along the edges about 3/8" from the edge of the fabric. Turn the sweatshirt right side out.

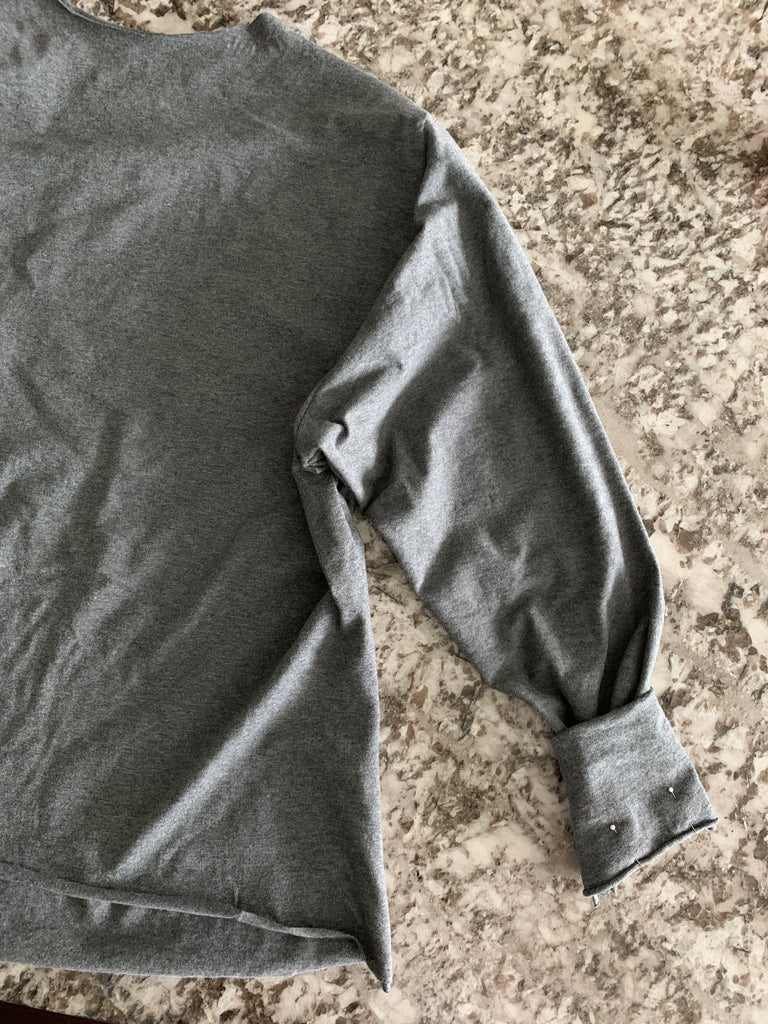
- Take your CUFFS and fold each one in half so that you have a V shape on one side. Sew along the edge of the V about 3/8" from the edge of the fabric. Take those sewn pieces and fold half of it over on top of the other half to make a donut shape. The CUFFS should look tapered.

- Take your CUFFS and slide them on to the arms of the sweatshirt so that the wide, raw edge of the CUFF is lined up with the arm hole on the sweatshirt. Pin along the edge and sew about 3/8" from the edge of the fabric. Fold the cuffs down.
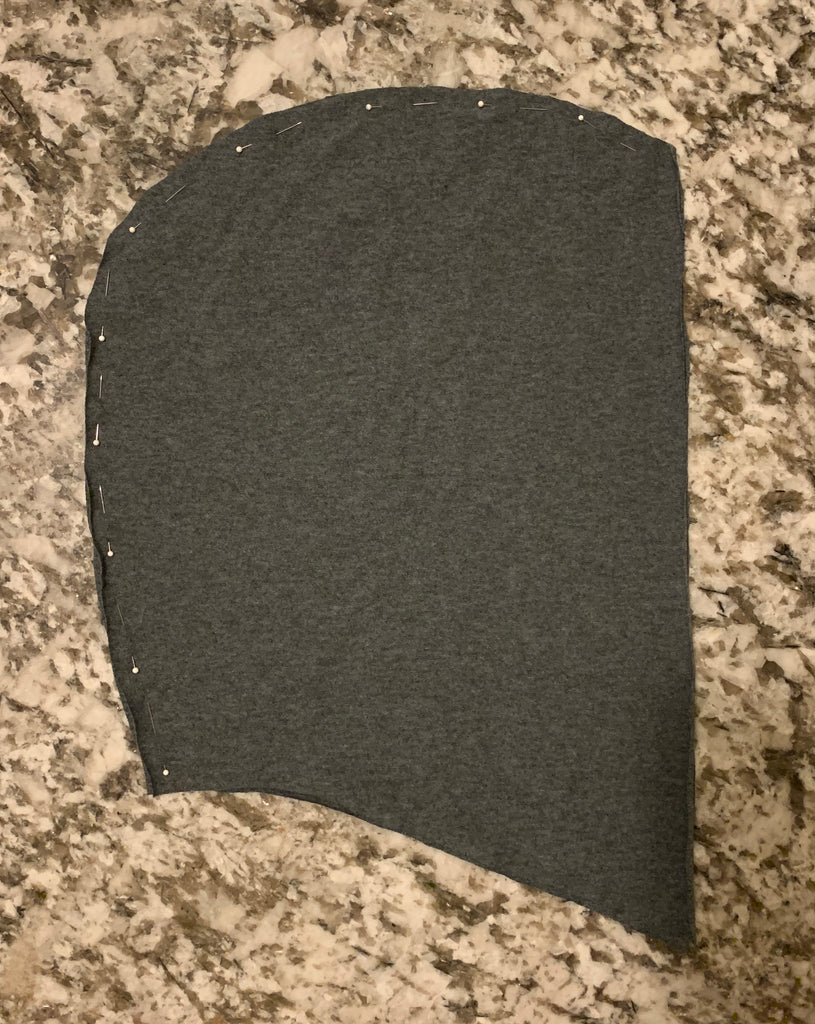
- Try on the sweatshirt and make sure the hole for your head is the right size. If the front feels like it is choking you, cut away a little fabric. The next step is to make the hood. Take your two HOOD pieces, line them up, and pin around the curved edge. Sew along the edge about 3/8" from the edge of the fabric. Turn the hood right side out and fold the long straight edges back about 1/4" two times. Pin and sew along the folded edge to secure it.
- To attach the HOOD to the sweatshirt, line up the seam at the back of the raw edge of the HOOD with the middle of the back of the neck on your sweatshirt. Pin the HOOD so that the right side of the HOOD is touching the right side of the sweatshirt. Continue pinning around the neck hole until the ends meet at the front. If you have some overlap, just pin one side down all the way and fold the other on top. This will create a nice shape at the neck of the sweatshirt. Sew along the pins about 3/8" from the edge of the fabric to attach the hood.

- Try on the sweatshirt and adjust the length by placing a pin where you want it to hit. Take off the sweatshirt and cut along the bottom if needed. You're done!


This Tutorial was created by Julia Bleck of Bunny Baubles Blog